
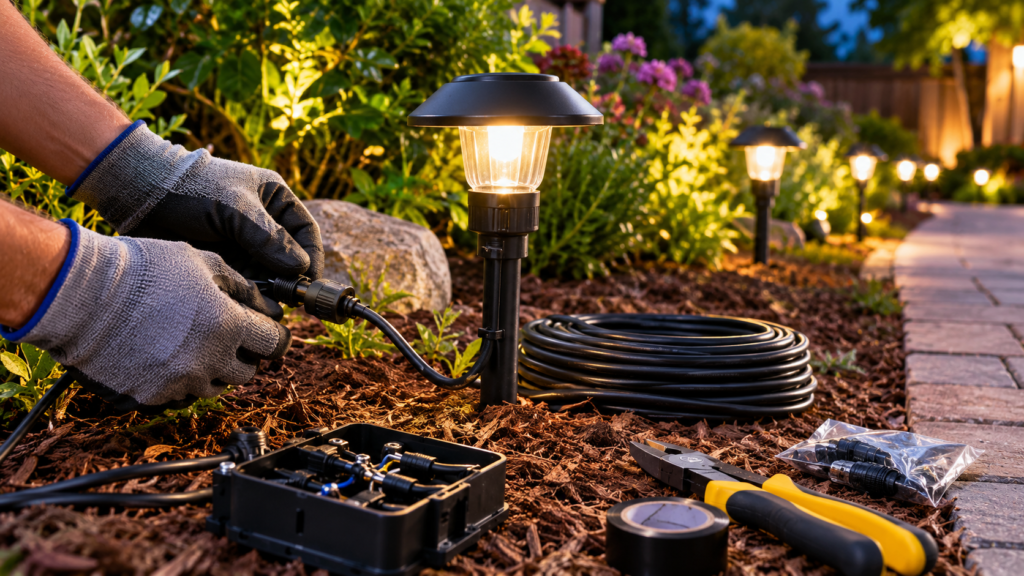
Introduction
Wiring garden lights is one of the best ways to
enhance your outdoor space with safe, reliable, and attractive lighting.
Whether you want to illuminate pathways, highlight trees and flower beds, or
improve security around your home, a properly wired garden lighting system
provides consistent performance throughout the year.
In this guide, you’ll learn everything you need to know about
wiring garden lights, including the tools and materials you’ll need, how to
plan your lighting layout, step-by-step installation methods, low-voltage and
mains-powered systems, common mistakes to avoid, troubleshooting tips,
maintenance advice, and answers to frequently asked questions. By the end,
you’ll have the knowledge to install a durable and efficient garden lighting
system with confidence.
What Is Wiring Garden Lights?
Wiring garden lights is the process of connecting outdoor
lighting fixtures to a power source so they can safely and reliably illuminate
your garden, pathways, patios, driveways, and landscaping. Depending on the
type of lighting system, this may involve installing low-voltage cables,
connecting a transformer, or wiring mains-powered fixtures according to local
electrical regulations.
The main goal of wiring garden lights is to provide
consistent lighting while keeping the electrical system protected from weather,
moisture, and accidental damage. A properly wired garden lighting system
improves safety, highlights landscape features, and creates a welcoming outdoor
atmosphere after dark.
There are several types of garden lighting systems you may
encounter:
Low-Voltage Garden Lights
Low-voltage systems usually operate on 12 volts and are the
most popular choice for DIY installations. They use a transformer to reduce
household voltage, making them safer and easier to install than mains-powered
systems.
Mains-Voltage Garden Lights
Mains-powered garden lights connect directly to your home’s
electrical supply. These systems are suitable for permanent installations but
typically require more careful planning and may need installation by a
qualified electrician, depending on local electrical codes.
Solar Garden Lights
Solar lights do not require traditional wiring because they
use built-in solar panels and rechargeable batteries. While they are easy to
install, they generally produce less consistent brightness than wired lighting
systems.
Modern smart lighting systems combine traditional wiring with
Wi-Fi or Bluetooth controls. These systems allow you to control brightness,
colors, schedules, and automation using a smartphone or voice assistant.
No matter which system you choose, proper wiring garden
lights ensures reliable performance, longer fixture life, and safer outdoor
operation. Using weather-resistant cables, waterproof connectors, and suitable
transformers helps protect the system from rain, moisture, and temperature
changes throughout the year.
How Garden Lighting Wiring Works
Understanding how wiring garden
lights works makes installation much easier and helps you build a safe,
reliable outdoor lighting system. In most cases, electricity travels from a
power source through cables to each light fixture. The exact setup depends on
whether you are installing a low-voltage or mains-voltage system.
For low-voltage systems, household electricity first passes
through a transformer that reduces the voltage from 120V or 230V (depending on
your country) to a safer 12V. The low-voltage cable then distributes power to
each garden light. Mains-voltage systems, on the other hand, connect directly
to your home’s electrical supply and require more robust wiring and
weatherproof protection.
Regardless of the system you choose, the basic components
remain similar:
•
Power source
•
Transformer (for low-voltage systems)
•
Outdoor-rated electrical cable
•
Waterproof connectors
•
Garden light fixtures
•
Timer or smart controller (optional)
A well-planned layout ensures every fixture receives enough
power while minimizing voltage drop and improving the overall appearance of
your garden.
Low Voltage vs Mains Voltage Garden Lighting
Choosing the right system is one of the most important
decisions when wiring garden lights. Both
options have advantages depending on your budget, installation experience, and
lighting requirements.
Feature
Low Voltage
Mains Voltage
Operating voltage
Usually 12V
120V or 230V
Safety
Very safe for DIY installations
Higher electrical risk
Installation
Easier and quicker
More complex
Best for
Pathways, flower beds, patios
Large gardens and high-power lighting
Energy efficiency
Excellent when using LED lights
Also efficient with LED fixtures
Maintenance
Simple
May require professional servicing
Low-voltage lighting is the preferred choice for most
homeowners because it is easier to install and safer to work with.
Mains-voltage lighting is better suited for permanent installations where
brighter lighting or higher-powered fixtures are required.
Why Proper Wiring Matters
Proper wiring garden lights
is essential for both safety and long-term performance. Incorrect wiring can
cause lights to flicker, become dim due to voltage drop, or stop working
altogether. In more serious cases, poor electrical connections may increase the
risk of equipment damage or electrical hazards.
A correctly installed system offers several benefits:
•
Provides consistent brightness across all garden
lights.
•
Reduces the risk of electrical faults.
•
Protects cables and connectors from moisture and
weather.
•
Extends the lifespan of light fixtures and
transformers.
•
Makes future maintenance and expansion much
easier.
•
Improves the overall appearance of your outdoor
lighting.
To achieve the best results, always use outdoor-rated cables,
waterproof connectors, and the correct transformer size for your lighting load.
Planning cable routes before installation also helps reduce unnecessary cable
lengths and improves the efficiency of the entire lighting system.
Benefits of Wiring Garden Lights
Investing in wiring garden lights offers much more than just
outdoor illumination. A properly installed lighting system improves safety,
enhances the beauty of your landscape, and provides dependable lighting
throughout the year. Whether you are lighting a small backyard or a large
garden, wired lighting delivers consistent performance that battery-powered
alternatives often cannot match.
Improved Safety
One of the biggest advantages of wiring garden lights is
improved safety. Well-lit pathways, driveways, stairs, and entrances reduce the
risk of trips and falls after dark. Lighting also helps family members and
guests move around the garden more confidently.
In addition, illuminated outdoor spaces can discourage
unwanted visitors by reducing dark hiding spots around your property.
Better Nighttime Visibility
A wired garden lighting system provides bright and consistent
illumination that makes it easier to navigate your outdoor space at night.
Unlike battery-powered lights that may dim over time, wired lights maintain
reliable brightness when installed correctly.
Good visibility is especially important for:
Garden paths
Decks and patios
Steps and retaining walls
Driveways
Outdoor seating areas
Enhanced Landscape Appearance
One of the most noticeable benefits of wiring garden lights
is the dramatic improvement in your garden’s appearance after sunset. Strategic
lighting highlights trees, flower beds, water features, sculptures, and
architectural details, creating depth and visual interest.
By combining uplights, pathway lights, and accent lighting,
you can create a warm and inviting outdoor environment that can be enjoyed long
after the sun goes down.
Increased Property Value
A professionally installed garden lighting system can improve
your home’s curb appeal and make the property more attractive to potential
buyers. Outdoor lighting gives the impression of a well-maintained home and
adds functional living space by making gardens and patios usable during the
evening.
While lighting alone will not determine a property’s value,
it can enhance the overall presentation and appeal of your home.
Greater Reliability Than Battery-Powered Lighting
Compared with battery-operated lights, wiring garden lights
provides a much more dependable lighting solution. Wired systems deliver
continuous power without the need to replace or recharge batteries regularly.
Some advantages include:
Consistent brightness
Less maintenance
Reliable operation in different weather conditions
No unexpected battery failures
Longer-lasting performance
This makes wired lighting an excellent choice for homeowners
who want dependable outdoor lighting throughout the year.
Energy Efficiency with LED Systems
Modern wiring garden lights often uses LED fixtures, which
consume significantly less electricity than traditional halogen or incandescent
bulbs. LEDs also produce less heat and have a much longer lifespan, helping
reduce both energy bills and maintenance costs.
Additional benefits of LED garden lighting include:
Lower electricity consumption
Long operating life
Minimal maintenance
Instant full brightness
Wide range of color temperatures
Compatibility with timers and smart lighting systems
By combining LED fixtures with a well-designed wiring system,
you can enjoy attractive outdoor lighting while keeping energy usage low.
Types of Garden Lights You Can Wire
When wiring garden lights, choosing the right type of fixture
is just as important as installing the wiring correctly. Different garden
lights are designed for specific purposes, such as improving safety,
highlighting landscape features, or creating a relaxing outdoor atmosphere. By
combining multiple types of lights, you can achieve a balanced and attractive
lighting design.
Path Lights
Path lights are one of the most common choices for garden
lighting. They are installed along walkways, driveways, and garden paths to
improve visibility and guide people safely through outdoor spaces.
Benefits of path lights include:
Increased nighttime safety
Clearly defined walkways
Attractive landscape borders
Soft, even illumination
Spotlights
Spotlights produce a focused beam of light that draws
attention to specific landscape features. They are commonly used to highlight
trees, shrubs, statues, garden walls, or architectural details.
Spotlights work especially well when wiring garden lights for
decorative purposes because they create depth and visual contrast after dark.
Floodlights
Floodlights provide a wide beam of bright light, making them ideal
for illuminating larger areas such as lawns, driveways, patios, and outdoor
entertainment spaces.
They are often installed for:
Security lighting
Large gardens
Outdoor gatherings
Parking areas
Wide landscape coverage
Deck and Step Lights
Deck and step lights improve both safety and appearance by
illuminating stairs, decking, retaining walls, and raised platforms. These
low-profile fixtures reduce trip hazards while adding a modern touch to outdoor
living areas.
Many homeowners include deck and step lights when wiring
garden lights because they blend seamlessly into the surrounding structure and
provide subtle, glare-free lighting.
In-Ground Lights
Also known as recessed or well lights, in-ground lights are
installed flush with the ground. They are perfect for highlighting trees,
columns, walls, or pathways without visible fixtures.
Because they sit below ground level, these lights should
always be installed with waterproof fittings and proper drainage to ensure
long-term performance.
Wall Lights
Wall-mounted garden lights are commonly installed on fences,
exterior walls, garages, pergolas, and entrances. They provide functional
lighting while enhancing the overall appearance of your home’s exterior.
Wall lights are ideal for:
Entryways
Patios
Garden walls
Outdoor seating areas
Side access paths
Pond and Water Feature Lights
Specially designed waterproof lights can be wired to
illuminate ponds, fountains, waterfalls, and other water features. These fixtures
create striking reflections and add a dramatic effect to your landscape after
sunset.
When installing lighting near water, always use products
specifically rated for wet environments and follow electrical safety
requirements.
Smart Garden Lights
Smart garden lights combine traditional wiring with advanced
controls such as Wi-Fi, Bluetooth, or Zigbee. These systems allow you to
control your outdoor lighting through a smartphone app or voice assistant.
Features may include:
Scheduled on/off times
Brightness adjustment
Color-changing effects
Lighting scenes
Remote control
Integration with smart home systems
Smart lighting offers added convenience while maintaining the
reliability of a wired installation.
No matter which fixtures you choose, proper wiring garden
lights ensures each light receives reliable power and performs efficiently. A
combination of path lights, accent lights, and security lighting often provides
the best balance of safety, functionality, and visual appeal.
Before you begin wiring garden lights, gather all the necessary tools and materials. Using the right equipment makes the installation easier, safer, and more reliable. Most low-voltage garden lighting systems require only a few basic electrical tools and components.
Low-Voltage Cable
Low-voltage cable is used to connect the transformer to each
garden light. It carries electricity safely throughout your lighting system.
Choose a cable gauge that matches the total wattage of your lights and the
distance between the transformer and the fixtures.
Transformer
A transformer converts your home’s standard 120V or 230V
electricity into a safe low-voltage output (usually 12V or 24V) for outdoor
lighting. Select a transformer with enough capacity to handle the combined
wattage of all your LED garden lights, plus a little extra for future
expansion.
LED Garden Lights
LED garden lights are the most popular choice because they
consume less energy, produce less heat, and last much longer than traditional
bulbs. They are available in many styles, including spotlights, path lights,
deck lights, and floodlights.
Waterproof Connectors
Outdoor wiring is exposed to moisture, so waterproof
connectors are essential. They create secure electrical connections while
preventing water from causing corrosion or electrical faults.
Junction Boxes
Junction boxes protect electrical connections and keep wiring
organized. If your wiring garden lights project includes multiple cable
branches or permanent connections, use outdoor-rated waterproof junction boxes.
Cable Clips
Cable clips hold wiring securely along fences, walls, decks,
or other structures. They prevent cables from sagging, moving, or becoming
damaged over time.
Wire Stripper
A wire stripper allows you to remove insulation from
electrical cables without damaging the conductors. This tool makes it easy to
prepare wires for secure connections.
Screwdriver
You’ll need both flathead and Phillips screwdrivers for
mounting transformers, tightening terminal screws, installing junction boxes,
and securing light fixtures.
Spade or Trenching Tool
A garden spade or trenching tool helps you dig shallow
trenches for burying low-voltage cables. In most cases, burying cables a few
inches below the surface provides protection while making future maintenance
easier.
Voltage Tester
A voltage tester helps confirm that power is present before
testing the lights. It is also useful for troubleshooting if certain fixtures
fail to turn on after installation.
Outdoor-Rated Electrical Tape
Outdoor-rated electrical tape provides additional insulation
and protection for exposed wiring connections. While it should not replace
waterproof connectors, it offers an extra layer of protection against moisture
and wear.
Quick Checklist for Wiring Garden Lights
Before starting your wiring garden lights project, make sure
you have:
Low-voltage cable
Outdoor transformer
LED garden lights
Waterproof connectors
Outdoor junction boxes
Cable clips
Wire stripper
Screwdriver
Spade or trenching tool
Voltage tester
Outdoor-rated electrical tape
Having these tools and materials ready before installation
will help you complete the project efficiently and reduce the chances of wiring
mistakes or unnecessary delays.
Planning Your Garden Lighting Layout
Proper planning is one of the most important steps in wiring
garden lights. A well-designed layout ensures your garden looks attractive,
provides enough light where needed, and reduces the amount of cable required.
Taking a little time to plan before installation can save you both time and
money.
Identify the Areas You Want to Light
Start by deciding which parts of your garden need
illumination. Think about both safety and appearance. Common areas include:
Garden pathways
Driveways
Patios and decks
Flower beds
Trees and shrubs
Water features
Garden walls and fences
Outdoor seating areas
Avoid placing lights everywhere. Instead, focus on
highlighting key features while leaving some darker areas for a natural
nighttime effect.
Choose the Right Type of Lighting
Different areas require different types of garden lights. For
example:
Path lights improve safety along walkways.
Spotlights highlight trees, sculptures, or architectural
features.
Floodlights provide broader illumination for larger spaces.
Deck or step lights improve visibility on stairs and raised
platforms.
Wall lights add security and enhance outdoor living spaces.
Using a combination of lighting types creates a balanced and
professional-looking result.
Measure Cable Runs
When wiring garden lights, measure the distance from the
transformer to each light fixture. Accurate measurements help you purchase the
correct amount of low-voltage cable and reduce unnecessary waste.
Try to keep cable runs as short as possible to minimize
voltage drop, especially in larger gardens.
Decide Where to Place the Transformer
Install the transformer close to a weatherproof outdoor power
outlet. It should be:
Easily accessible for maintenance
Protected from direct rain where possible
Located near the center of your lighting system to shorten
cable runs
A central location often provides more even power
distribution to all fixtures.
Plan Cable Routes
Map out where the cables will run before digging any
trenches. Whenever possible:
Follow the edges of paths or flower beds.
Avoid areas where future digging is likely.
Keep cables away from irrigation systems.
Minimize crossings under walkways or driveways.
Planning the cable route in advance makes installation
cleaner and simplifies future maintenance.
Balance Lighting Levels
Good garden lighting is about creating the right atmosphere,
not making the garden as bright as daylight. Mix brighter feature lights with
softer ambient lighting to create depth and visual interest.
Avoid placing powerful lights directly opposite each other,
as this can create harsh glare.
Leave Room for Future Expansion
If you think you may add more lights later, plan for it now.
Choose a transformer with extra capacity and leave some accessible cable routes
for future fixtures. This makes expanding your wiring garden lights system much
easier without having to start over.
Sketch Your Lighting Plan
Before installing anything, draw a simple layout of your
garden that includes:
Transformer location
Cable routes
Position of each light fixture
Junction boxes (if used)
Power connections
A basic sketch helps you stay organized during installation
and reduces the risk of mistakes.
Planning Tips for Better Results
Keep these tips in mind when planning your wiring garden
lights project:
Highlight key landscape features instead of lighting every
area.
Use multiple lighting types for a layered effect.
Measure cable distances before purchasing materials.
Keep cable runs as short as practical.
Position the transformer in a central, accessible location.
Plan for future additions to your lighting system.
A well-planned layout makes the installation process smoother
and ensures your wiring garden lights project delivers both functional and
attractive outdoor lighting for years to come.
Step-by-Step Guide to Wiring Garden Lights
Once you have planned your layout and gathered all the
necessary tools, it’s time to begin wiring garden lights. Most homeowners
choose a low-voltage lighting system because it is safer, easier to install,
and ideal for gardens. Follow these steps to install your garden lighting
correctly.
Step 1: Turn Off the Power
Before starting any electrical work, switch off the power at
the circuit breaker if you will be connecting the transformer to your home’s
electrical supply. This helps prevent electrical shock and ensures a safe
installation.
Even though the lighting system uses low voltage, safety
should always come first.
Step 2: Position the Transformer
Mount the transformer near a weatherproof outdoor power
outlet. Choose a location that is:
Easily accessible
Protected from excessive rain and direct sunlight
Close to the center of your lighting layout
Do not plug in or turn on the transformer until the entire
wiring garden lights installation is complete.
Step 3: Place the Garden Lights
Position each LED garden light according to your lighting
plan. Before securing them permanently, check that they are aimed in the
desired direction.
For example:
Place path lights evenly along walkways.
Aim spotlights toward trees or garden features.
Position floodlights to illuminate larger areas.
Adjusting the lights now is much easier than after everything
is installed.
Step 4: Lay the Low-Voltage Cable
Run the low-voltage cable from the transformer to each light
fixture. Follow the planned cable route along the edges of flower beds, fences,
or pathways whenever possible.
Leave a little extra cable at each fixture to make
connections easier and allow for future adjustments.
Step 5: Connect the Lights
Use waterproof connectors to attach each light fixture to the
low-voltage cable. Make sure every connection is tight and fully sealed to
prevent moisture from entering.
If your system includes junction boxes, place all cable
connections inside weatherproof boxes for added protection.
Double-check every connection before moving on to the next
step.
Step 6: Test the Lighting System
Once all fixtures are connected, plug in the transformer and
switch on the power. Walk through the garden and check that every light works
properly.
Look for:
Lights that do not turn on
Flickering fixtures
Loose cable connections
Uneven brightness
Use a voltage tester if you need to troubleshoot any
electrical issues.
Step 7: Adjust Light Angles
After confirming that the system works correctly, adjust the
direction of spotlights and floodlights to achieve the desired lighting effect.
Avoid shining lights directly into windows or seating areas
where glare may become uncomfortable.
Small adjustments can make a significant difference in the
overall appearance of your garden.
Step 8: Bury and Secure the Cables
When you’re satisfied with the layout, bury the low-voltage
cable in a shallow trench according to the manufacturer’s recommendations.
Secure any exposed cable with cable clips where needed.
Cover the trench carefully without damaging the cable.
This final step protects the wiring from weather, lawn
equipment, and accidental damage.
Step 9: Perform a Final Inspection
Walk around the garden one last time and inspect the entire
wiring garden lights installation.
Check that:
Every fixture is secure.
All cables are protected.
Waterproof connectors are properly sealed.
The transformer is mounted securely.
The lighting is evenly distributed across the garden.
Making small adjustments now will help ensure your lighting
system performs reliably for years.
Common Installation Tips
To achieve the best results when wiring garden lights, keep
these tips in mind:
Test the system before burying any cables.
Use only outdoor-rated cables and connectors.
Keep cable runs as short as practical to reduce voltage drop.
Leave a little extra cable at each fixture for easier
maintenance.
Avoid placing lights too close together.
Regularly inspect your lighting system for loose connections
or damaged cables.
By following these steps, you can complete your wiring garden
lights project safely and efficiently. Careful installation not only improves
the appearance of your outdoor space but also helps ensure reliable performance
and easier maintenance in the future.
Wiring Garden Lights Using Low Voltage Systems
Low-voltage systems are the most popular choice for wiring
garden lights. They are safer than mains-voltage systems, easier to install,
and ideal for most residential gardens. A low-voltage setup typically operates
at 12V or 24V, making it suitable for pathways, flower beds, patios, and
landscape features.
Below is what you need to know before installing a
low-voltage garden lighting system.
Advantages of Low-Voltage Systems
There are several reasons why homeowners prefer low-voltage
systems for wiring garden lights.
Safer to install and use than mains-voltage systems.
Lower risk of electric shock.
Energy-efficient, especially when paired with LED lights.
Easier to expand by adding more fixtures later.
Lower electricity costs compared to traditional lighting.
Simple to maintain and troubleshoot.
Suitable for DIY installations in many situations.
Low-voltage lighting provides plenty of brightness while
keeping energy consumption low, making it an excellent long-term investment for
outdoor spaces.
Typical Wiring Method
The most common method for wiring garden lights is to connect
a low-voltage cable from the transformer to each light fixture. Depending on
the layout of your garden, there are several wiring configurations you can use.
Daisy Chain (Series Layout)
In a daisy chain, one cable runs from the transformer to the
first light and continues to each additional light.
Best for:
Small gardens
Short cable runs
A limited number of fixtures
Advantages:
Easy to install
Uses less cable
Lower installation cost
Disadvantages:
Voltage drop can become noticeable over long distances.
T-Connection Layout
A T-connection splits the cable into two or more branches
from a central point.
Best for:
Medium-sized gardens
Multiple lighting zones
Advantages:
More even power distribution
Reduced voltage drop compared to long daisy chains
Hub or Star Layout
Each light or group of lights runs directly back to a central
hub near the transformer.
Best for:
Large gardens
Professional landscape lighting systems
Advantages:
Excellent voltage balance
Easier troubleshooting
Consistent brightness across all fixtures
Maximum Cable Length
The maximum cable length depends on several factors,
including:
Transformer voltage
Total wattage of the lights
Cable thickness (wire gauge)
Acceptable voltage drop
As a general guideline:
Cable SizeTypical Maximum Distance*16 AWG (1.5 mm²)Up to 50
ft (15 m)14 AWG (2.5 mm²)Up to 100 ft (30 m)12 AWG (4 mm²)Up to 150 ft (45 m)10
AWG (6 mm²)Up to 200 ft (60 m)
*These are general estimates. Actual maximum distances vary
depending on the total load and manufacturer recommendations.
If your lighting layout requires longer cable runs, consider
using thicker cable or dividing the system into multiple branches.
Voltage Drop Considerations
Voltage drop occurs when electricity loses voltage as it
travels through a long cable. Excessive voltage drop can cause:
Dimmer lights at the end of the cable
Uneven brightness between fixtures
Reduced LED performance
Shorter lifespan for lighting components
To minimize voltage drop when wiring garden lights:
Keep cable runs as short as possible.
Use thicker cables for longer distances.
Position the transformer near the center of the lighting
layout.
Divide large systems into separate cable runs.
Avoid connecting too many lights to a single cable.
Keeping voltage drop below 5% is generally recommended for
consistent lighting performance.
Best Cable Sizes
Choosing the correct cable size is essential for safe and
efficient wiring garden lights.
Cable SizeRecommended Use16 AWG (1.5 mm²)Small gardens with
short cable runs and a few LED lights14 AWG (2.5 mm²)Medium-sized gardens with
moderate cable distances12 AWG (4 mm²)Large gardens or systems with higher
wattage10 AWG (6 mm²)Long cable runs or professional landscape lighting
installations
When in doubt, selecting a slightly thicker cable is often a
smart choice. It reduces voltage drop and allows for future expansion without
replacing the wiring.
Best Practices for Wiring Garden Lights with Low Voltage
Follow these best practices to get the most from your
low-voltage lighting system:
Choose a transformer with extra capacity for future
additions.
Use waterproof connectors for every outdoor connection.
Select the correct cable size based on cable length and total
wattage.
Keep cable runs as short and direct as possible.
Test the system before burying the cables.
Inspect connections regularly to ensure reliable performance.
A well-designed low-voltage system makes wiring garden lights
safer, more efficient, and easier to maintain. With the right transformer,
cable size, and wiring layout, you can enjoy bright, reliable outdoor lighting
while minimizing energy use and maintenance.
Wiring Garden Lights to Mains Power
While most homeowners choose low-voltage lighting, some
outdoor lighting systems require a direct connection to the mains electrical
supply. Wiring garden lights to mains power provides a constant source of
electricity and is often used for high-powered lighting installations or
permanent outdoor fixtures.
Because mains electricity can be dangerous, this type of
installation requires careful planning and must comply with local electrical
regulations.
When Should You Use Mains-Powered Garden Lights?
Mains-powered lighting is suitable for installations that
require more power than a low-voltage system can provide. It is commonly used
for:
Large outdoor gardens
Security floodlights
Permanent wall-mounted lights
Driveway lighting
Outdoor entertainment areas
Commercial landscape lighting
For small gardens or decorative lighting, a low-voltage
system is usually the safer and more practical option.
Components Needed
If you’re wiring garden lights to mains power, you’ll
typically need:
Outdoor-rated electrical cable
Waterproof junction boxes
Weatherproof electrical conduit
Outdoor light fixtures
Residual Current Device (RCD) or Ground Fault Circuit
Interrupter (GFCI), depending on local electrical standards
Circuit breaker
Waterproof cable glands
Outdoor-rated electrical tape
Voltage tester
Always use products specifically designed for outdoor
electrical installations.
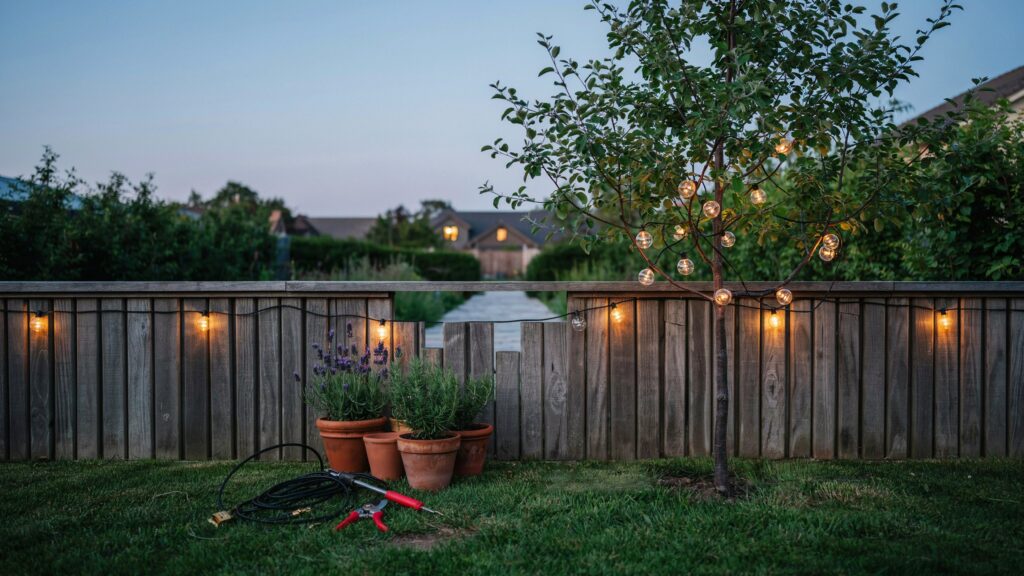
Basic Installation Process
Although the exact installation varies depending on the
lighting system, the general process includes the following steps.
1. Switch Off the Power
Turn off the electrical supply at the main breaker panel
before beginning any work. Verify that the circuit is de-energized using a
voltage tester.
2. Plan the Cable Route
Determine the safest route for underground or surface-mounted
cables. Keep cables away from water pipes, irrigation systems, and tree roots.
3. Install Conduit
Outdoor mains cables should usually be installed inside
suitable electrical conduit to protect them from moisture, impact, and UV
exposure.
4. Mount the Light Fixtures
Secure each garden light according to the manufacturer’s
instructions before making electrical connections.
5. Make Waterproof Connections
Connect the wiring inside weatherproof junction boxes using
outdoor-rated connectors and cable glands. Ensure every connection is properly
sealed against moisture.
6. Test the System
Restore power and test every light to confirm the installation
is working correctly.
Safety Considerations
Safety is the most important part of wiring garden lights to
mains power.
Keep these precautions in mind:
Never work on live electrical circuits.
Use outdoor-rated cables, conduit, and fittings.
Protect outdoor circuits with an RCD or GFCI where required.
Keep all electrical connections inside waterproof enclosures.
Ensure fixtures have an appropriate outdoor
weather-resistance rating (such as IP65 or higher for exposed locations).
Inspect cables regularly for signs of wear or damage.
If you are unfamiliar with mains electrical work, seek
assistance from a qualified electrician.
Mains Power vs. Low Voltage
Here’s how mains-powered and low-voltage systems compare:
FeatureMains PowerLow VoltageVoltage120V or 230V (varies by
country)12V or 24VInstallationMore complexEasierSafetyHigher electrical
riskSafer for most DIY projectsBest ForSecurity and high-power
lightingDecorative and landscape lightingEnergy EfficiencyGood with LED
fixturesExcellent with LED fixturesMaintenanceMay require professional
servicingEasier to maintain
Do You Need a Professional Electrician?
For many homeowners, wiring garden lights with a low-voltage
system is a manageable DIY project. However, connecting lights directly to the
mains electrical supply is more complex.
In many countries, installing or modifying mains electrical
wiring must be carried out—or at least inspected and approved—by a qualified
electrician to ensure compliance with local electrical codes and safety
standards.
Hiring a professional can help ensure:
Safe installation
Compliance with local regulations
Proper circuit protection
Long-term reliability
Reduced risk of electrical faults
Best Practices
Follow these best practices when wiring garden lights to
mains power:
Plan the cable route before digging or mounting fixtures.
Use only outdoor-rated cables and waterproof fittings.
Install cables in protective conduit where required.
Protect the circuit with appropriate safety devices.
Test all connections before completing the installation.
Follow local electrical regulations and manufacturer
instructions.
A mains-powered lighting system can provide reliable,
long-lasting illumination for larger outdoor spaces. However, because it
involves higher voltages and stricter safety requirements, careful planning and
proper installation are essential for a safe and dependable wiring garden
lights project.
When Mains Wiring Is Necessary
Most wiring garden lights projects can be completed using a
low-voltage system. However, there are situations where connecting lights
directly to the mains electrical supply is the better or only option. Mains
wiring provides a higher power output and is suitable for permanent outdoor
lighting installations that require more electricity than a low-voltage system
can deliver.
You may need mains wiring if you are installing:
High-powered security floodlights
Permanent wall-mounted outdoor lights
Large landscape lighting systems
Commercial outdoor lighting
Garden lighting integrated with your home’s electrical system
Smart outdoor lighting that requires a constant mains power
supply
Because mains electricity involves higher voltages, it must
be installed with extra care and in accordance with local electrical
regulations.
Outdoor Electrical Safety Requirements
Safety should always be the top priority when wiring garden
lights with mains electricity. Outdoor electrical installations are exposed to
rain, moisture, dirt, temperature changes, and physical damage, so they require
additional protection.
Follow these essential safety requirements:
Use cables that are rated for outdoor use.
Install weatherproof light fixtures designed for exterior
environments.
Place electrical connections inside waterproof junction
boxes.
Use protective conduit where cables may be exposed or buried.
Select fixtures with a suitable IP (Ingress Protection)
rating for their location.
Keep electrical equipment away from standing water and areas
prone to flooding.
Follow the manufacturer’s installation instructions and local
electrical codes.
Regularly inspect your outdoor lighting system for damaged
cables, cracked fittings, or loose connections to maintain safe operation.
RCD/GFCI Protection
An RCD (Residual Current Device) or GFCI (Ground Fault
Circuit Interrupter) is an important safety device for outdoor electrical
circuits. It continuously monitors the flow of electricity and quickly
disconnects the power if it detects a fault, helping reduce the risk of
electric shock.
When wiring garden lights, RCD or GFCI protection is strongly
recommended—and in many regions, required by electrical regulations—for outdoor
lighting circuits.
Benefits include:
Protects against electric shock
Reduces the risk of electrical fires
Detects earth leakage faults quickly
Improves the overall safety of outdoor electrical
installations
Before installing your lighting system, confirm the
electrical protection requirements that apply in your area.
When to Hire a Licensed Electrician
Low-voltage lighting systems are often suitable for DIY
installation. However, when wiring garden lights to mains power, hiring a
licensed electrician is often the safest and most practical choice.
Consider hiring a professional if:
You need to install a new outdoor electrical circuit.
The lighting system connects directly to your home’s mains
supply.
You are unfamiliar with electrical wiring.
Underground mains cables need to be installed.
Local regulations require electrical work to be completed or
certified by a licensed electrician.
Your project involves complex lighting controls, timers, or
smart home integration.
A licensed electrician can ensure that the installation:
Meets local electrical codes
Uses the correct circuit protection
Is properly grounded where required
Is tested for safe operation
Minimizes the risk of future electrical faults
Although hiring a professional adds to the initial cost, it
can improve safety, ensure compliance with regulations, and provide peace of
mind for a long-lasting outdoor lighting system.
Key Takeaway
For most homeowners, wiring garden lights with a low-voltage
system is the simplest and safest option. Mains wiring should generally be
reserved for larger, permanent, or high-powered lighting installations. By
following outdoor electrical safety requirements, using RCD/GFCI protection,
and hiring a licensed electrician when necessary, you can create a safe,
reliable, and durable garden lighting system.
Common Wiring Garden Lights Mistakes to Avoid
Even a well-planned wiring garden lights project can run into
problems if common installation mistakes are overlooked. These errors can lead
to dim lights, electrical faults, unnecessary repairs, or a shorter lifespan
for your lighting system. Knowing what to avoid will help you build a safer and
more reliable outdoor lighting setup.
Using the Wrong Cable Size
Choosing the wrong cable size is one of the most common
mistakes when wiring garden lights. A cable that is too small may not carry
enough current over long distances, resulting in excessive voltage drop and
poor performance.
To avoid this:
Choose the cable size based on the total wattage of your
lights.
Consider the total cable length.
Use thicker cables for larger gardens or longer runs.
Follow the cable size recommendations provided by the
lighting manufacturer.
Overloading the Transformer
Every transformer has a maximum wattage rating. Connecting
too many lights can overload the transformer, causing overheating or system
failure.
To prevent overloading:
Calculate the total wattage of all light fixtures.
Select a transformer with at least 20–30% extra capacity for
future expansion.
Divide large lighting systems into multiple circuits if
necessary.
For example, if your lights require 160 watts, a transformer
rated for around 200 watts or more is a sensible choice.
Poor Waterproof Connections
Outdoor wiring is constantly exposed to rain, moisture, and
changing weather conditions. Loose or poorly sealed connections can allow water
to enter, leading to corrosion, short circuits, or light failures.
Always:
Use waterproof connectors.
Install outdoor-rated junction boxes where required.
Seal all electrical connections properly.
Inspect connectors periodically for signs of damage.
Shallow Cable Burial
Burying cables too close to the surface leaves them
vulnerable to damage from gardening tools, lawn equipment, pets, or foot
traffic.
For better protection:
Follow the cable burial depth recommended by the manufacturer
and local regulations.
Lay cables in a neat, planned route.
Avoid areas where future digging is likely.
Proper cable burial helps extend the life of your wiring
garden lights system.
Ignoring Voltage Drop
Voltage drop becomes more noticeable as cable runs get longer
or when too many lights are connected to one circuit.
Signs of voltage drop include:
Dim lights at the end of the cable.
Uneven brightness.
Reduced LED performance.
To reduce voltage drop:
Keep cable runs as short as possible.
Use thicker cables for long distances.
Position the transformer near the center of the lighting
layout.
Split large systems into multiple cable runs.
Incorrect Light Spacing
Placing lights too close together can create bright hotspots,
while spacing them too far apart may leave dark areas and reduce visibility.
For balanced lighting:
Space path lights evenly along walkways.
Use spotlights only to highlight key features.
Overlap light beams slightly for consistent illumination.
Test the lighting effect at night before making the
installation permanent.
Taking time to adjust the spacing can greatly improve the
appearance of your garden.
Mixing Incompatible Fixtures
Not all garden lighting components are designed to work
together. Mixing fixtures with different voltage requirements, incompatible
transformers, or mismatched connectors can cause poor performance or damage to
the system.
Before purchasing equipment:
Confirm that all fixtures operate at the same voltage.
Use a transformer that matches the system requirements.
Buy compatible connectors and accessories.
Follow the manufacturer’s recommendations for all components.
Using matching products helps ensure your wiring garden
lights project performs safely and efficiently.
Tips to Avoid Installation Mistakes
Keep these best practices in mind when wiring garden lights:
Select the correct cable size for your installation.
Never exceed the transformer’s rated capacity.
Use waterproof connectors for every outdoor connection.
Bury cables at the recommended depth.
Minimize voltage drop with proper cable planning.
Space lights evenly for balanced illumination.
Use compatible fixtures and electrical components.
Avoiding these common mistakes will help you create a safer,
more efficient, and longer-lasting garden lighting system. Careful planning and
proper installation ensure your wiring garden lights project delivers reliable
performance and enhances your outdoor space for years to come.
How to Troubleshoot Wiring Garden Lights
Even a properly installed wiring garden lights system can
occasionally develop problems. Lights may stop working due to loose
connections, damaged cables, overloaded transformers, or normal wear over time.
Fortunately, many common issues can be identified and fixed with a systematic
approach.
Before beginning any troubleshooting, switch off the power to
the lighting system and follow the manufacturer’s safety instructions.
Check the Power Supply
The first step is to confirm that the system is receiving
power.
For low-voltage systems:
Make sure the transformer is plugged in.
Check that the transformer is switched on.
Verify that the outdoor power outlet is working.
Inspect the circuit breaker if the transformer has no power.
For mains-powered systems:
Check the circuit breaker or fuse.
Ensure any wall switches controlling the lights are turned
on.
Confirm that any timer or smart controller is operating
correctly.
Inspect the Transformer
A faulty or overloaded transformer can prevent all of the
lights from working.
Look for:
Indicator lights showing normal operation
Burn marks or signs of overheating
Loose terminal connections
Unusual buzzing noises
If the transformer is overloaded, disconnect some fixtures
and test the system again.
Test Individual Light Fixtures
If only one or two lights are not working, the problem is
likely limited to those fixtures.
Check for:
Burned-out LED modules (if replaceable)
Loose wire connections
Water inside the fixture
Physical damage caused by weather or impact
Replace damaged fixtures if necessary.
Examine the Wiring Connections
Loose or corroded connections are one of the most common
causes of lighting failures when wiring garden lights.
Inspect every connection for:
Loose wires
Corrosion
Moisture intrusion
Damaged waterproof connectors
Reconnect or replace faulty connectors and ensure all
junction boxes remain properly sealed.
Look for Damaged Cables
Outdoor cables can become damaged by:
Gardening tools
Lawn mowers
Rodents
Tree roots
Heavy foot traffic
Weather exposure
Walk along the cable route and inspect for cuts, crushed
sections, or exposed wiring.
Replace damaged cable sections using waterproof connectors or
install new cable where needed.
Image suggestion: Display a damaged underground cable being
repaired with a waterproof connector.
Check for Voltage Drop
If lights become dimmer toward the end of the cable run,
voltage drop may be the problem.
Common signs include:
Uneven brightness
Flickering lights
Distant fixtures appearing much dimmer
To reduce voltage drop:
Shorten cable runs where possible.
Upgrade to a thicker cable.
Split the system into multiple cable branches.
Move the transformer closer to the center of the lighting
layout.
Verify the Transformer Capacity
An overloaded transformer may cause:
Lights turning off unexpectedly
Flickering
Overheating
Reduced brightness
Calculate the combined wattage of all connected fixtures and
compare it with the transformer’s maximum capacity.
Ideally, the transformer should have about 20–30% spare
capacity to allow for reliable operation and future expansion.
Inspect Timers and Smart Controls
If your wiring garden lights system uses timers, photocells,
or smart controllers, these devices may be causing the problem.
Check that:
Timer settings are correct.
The photocell is not blocked by dirt or leaves.
Smart lighting schedules are properly configured.
Batteries (if applicable) are not depleted.
Sometimes simply resetting the controller restores normal
operation.
Use a Voltage Tester
A voltage tester helps determine whether electricity is
reaching different parts of the lighting system.
Use it to check:
Transformer output
Cable connections
Junction boxes
Individual light fixtures
If voltage is present at the transformer but not at a
fixture, the problem is likely between those two points.
Always use the tester according to the manufacturer’s
instructions and avoid testing live mains wiring unless you are qualified to do
so.
Common Problems and Solutions
ProblemPossible CauseSolutionNo lights workNo power, faulty
transformer, tripped breakerCheck the power supply and transformerOne light
doesn’t workLoose connection or faulty fixtureInspect and replace the fixture
or connectorDim lightsVoltage drop or overloaded circuitUse thicker cable or
shorten cable runsFlickering lightsLoose wiring or overloaded
transformerTighten connections and reduce electrical loadLights work
intermittentlyMoisture inside connectors or damaged cableReplace waterproof
connectors or repair the cableUneven brightnessLong cable runs or incorrect
wiring layoutDivide the system into multiple branches
Prevent Future Problems
Regular maintenance helps keep your wiring garden lights
system working reliably.
Follow these simple maintenance tips:
Inspect cables and connectors at least once a year.
Clean dirt and debris from light fixtures.
Replace damaged waterproof connectors promptly.
Check the transformer for signs of wear or overheating.
Trim plants that may block or damage the lights.
Test the lighting system after severe weather.
A few minutes of routine maintenance can prevent costly
repairs and extend the lifespan of your garden lighting.
When to Call a Professional
While many low-voltage lighting problems can be fixed by
homeowners, some situations require professional assistance.
Contact a qualified electrician if:
A mains-powered lighting circuit repeatedly trips the
breaker.
You notice burning smells, sparks, or overheating components.
Underground mains wiring has been damaged.
Water has entered electrical enclosures.
You cannot identify the source of the fault after basic troubleshooting.
By following a step-by-step troubleshooting process, most
issues with wiring garden lights can be identified quickly and resolved safely.
Regular inspections, proper maintenance, and timely repairs will help keep your
outdoor lighting system operating efficiently and looking its best for years to
come.
Common Wiring Garden Light Problems and How to Fix Them
Even with careful installation, issues can sometimes occur
after wiring garden lights. Most problems are caused by loose connections,
damaged cables, moisture, or an overloaded transformer. The good news is that
many of these issues can be diagnosed and fixed without replacing the entire
lighting system.
Lights Not Turning On
If none of your garden lights turn on, start by checking the
power source.
Possible causes include the following:
The transformer is unplugged or switched off.
A circuit breaker has tripped.
A fuse has blown.
A loose cable connection.
A faulty transformer.
A timer or photocell is incorrectly set.
How to fix it:
Confirm the outdoor power outlet is working.
Check that the transformer is receiving power.
Reset any tripped circuit breakers.
Inspect all cable connections.
Test the transformer output using a voltage tester.
Verify timer and smart controller settings.
If only one light is not working, inspect that fixture and
its connector before assuming there is a larger system fault.
Flickering Lights
Flickering lights are a common issue after wiring garden
lights and usually indicate an unstable electrical connection.
Common causes include:
Loose wiring connections
Corroded connectors
An overloaded transformer
Moisture inside electrical connections
Voltage fluctuations
How to fix it:
Tighten all cable connections.
Replace damaged waterproof connectors.
Remove moisture from junction boxes or connectors.
Reduce the load if the transformer is overloaded.
Replace faulty fixtures if the problem affects only one
light.
If flickering continues, inspect the wiring for hidden cable
damage.
Dim Lights
Dim lighting often points to voltage drop or an overloaded
circuit.
Possible causes include the following:
Long cable runs
Cable that is too small
Too many lights connected to one transformer
Loose electrical connections
How to fix it:
Use a larger cable size for long distances.
Shorten cable runs where possible.
Divide the lighting system into multiple branches.
Upgrade to a transformer with a higher capacity if needed.
Check for loose or corroded connections.
Proper planning during wiring garden lights helps prevent
voltage drop and ensures consistent brightness throughout the garden.
Transformer Problems
The transformer is the heart of a low-voltage garden lighting
system. If it fails, the entire lighting system may stop working.
Signs of transformer problems include:
No power output
Overheating
Buzzing sounds
Frequent shutdowns
Burn marks or a burning smell
How to fix it:
Verify that the transformer is plugged in.
Check the input and output voltage.
Reduce the electrical load if the transformer is overloaded.
Replace the transformer if it shows signs of damage.
Ensure the transformer has adequate ventilation.
Choosing a transformer with about 20–30% extra capacity can
improve reliability and allow for future lighting additions.
Damaged Underground Cable
Underground cables can become damaged over time due to
gardening activities, rodents, tree roots, or accidental digging.
Signs of cable damage include:
One section of lights no longer works.
Intermittent lighting.
Flickering fixtures.
Visible cuts or crushed cable.
How to fix it:
Locate the damaged section.
Replace the damaged cable or repair it using waterproof
connectors designed for underground use.
Rebury the cable at the recommended depth.
Protect the cable from future damage by following a planned
cable route.
Inspecting underground wiring periodically can help identify
problems before they affect the entire wiring garden lights system.
Image suggestion: Show a damaged underground cable being
repaired with a waterproof splice connector.
Water Inside Connectors
Outdoor electrical connections are constantly exposed to
moisture. If connectors are not properly sealed, water can enter and cause
corrosion or short circuits.
Common signs include:
Flickering lights
Lights that stop working after rain
Corroded metal contacts
Intermittent electrical faults
How to fix it:
Disconnect the power before inspecting connectors.
Replace connectors that show corrosion or water damage.
Use high-quality waterproof connectors for all outdoor
connections.
Ensure junction boxes are fully sealed.
Replace cracked or damaged connector housings.
Using weatherproof electrical components is one of the best
ways to improve the long-term reliability of your garden lights wiring
installation.
Quick Troubleshooting Table
Problem Most Likely Cause Recommended Solution: Lights not
turning on No power, faulty transformer, loose connection Check the power
supply, transformer, and wiring. Flickering lights, loose or wet connections
Tighten or replace waterproof connectors. Dim lights, voltage drop, or
overloaded transformer Use a thicker cable or reduce the electrical load.
Transformer not working Overload or equipment failure Test, reset, or replace
the transformer. Underground cable damage Cuts, crushing, or rodent damage
Repair or replace the damaged cable. Water inside connectors Poor waterproof
sealing Replace connectors and reseal all connections.
By understanding these common issues, you can quickly
identify and resolve most problems after wiring garden lights. Regular
inspections, waterproof connections, and proper cable installation will help
keep your outdoor lighting system safe, reliable, and operating at its best.
Maintenance Tips for Wired Garden Lights
Regular maintenance is essential for keeping your wired
garden lights system safe, reliable, and looking its best. Dirt, moisture,
weather, and plant growth can affect the performance of outdoor lighting over
time. By performing a few simple maintenance tasks throughout the year, you can
extend the lifespan of your lighting system and reduce the need for costly
repairs.
Inspect Cables Regularly
Outdoor cables can be damaged by gardening tools, lawn
equipment, pets, tree roots, or harsh weather conditions. Regular inspections
help you identify problems before they become serious.
Check for:
Cracked or worn cable insulation
Exposed wires
Loose cable clips
Signs of rodent damage
Cables that have become exposed above the ground
Repair or replace damaged cable sections as soon as possible
to prevent electrical faults.
Clean Light Fixtures
Over time, dirt, dust, leaves, and insect debris can reduce
the brightness of your garden lights.
To keep fixtures performing well:
Wipe lenses with a soft cloth.
Remove leaves and debris around fixtures.
Clean dirt from light covers using mild soap and water.
Avoid abrasive cleaners that could scratch the lenses.
Cleaning your fixtures several times a year helps maintain
maximum light output and keeps your garden looking attractive at night.
Replace Damaged Connectors
Waterproof connectors protect electrical connections from
moisture, but they can wear out over time.
Inspect connectors for:
Cracks
Corrosion
Loose fittings
Water intrusion
Broken locking mechanisms
Replace damaged connectors immediately using outdoor-rated
waterproof replacements. Proper connections are essential for a reliable wired
garden lights system.
Test the Transformer Annually
The transformer is the power source for most low-voltage
garden lighting systems. Testing it once a year helps ensure it continues
operating correctly.
Check for:
Proper output voltage
Loose wiring terminals
Overheating
Rust or corrosion
Physical damage
If the transformer produces inconsistent voltage or shows
signs of wear, it may need repair or replacement.
Check Waterproof Seals
Outdoor lighting components rely on waterproof seals to keep
moisture away from electrical connections.
Inspect:
Junction box seals
Connector gaskets
Fixture seals
Cable entry points
Transformer housing
Replace worn or cracked seals to prevent water from entering
the system. This simple step can help avoid corrosion and electrical failures.
Trim Surrounding Plants
Plants and shrubs naturally grow around garden lights over
time. If left unchecked, they can block the light, trap moisture, and even
damage cables.
Regularly:
Trim bushes around fixtures.
Remove branches covering lights.
Keep grass away from pathway lights.
Prevent roots from disturbing underground cables.
Maintaining clear space around your lighting fixtures
improves both performance and appearance.
Image suggestion: Show someone trimming shrubs around garden
lights to restore proper illumination.
Seasonal Maintenance Checklist
Use this checklist to keep your wired garden lights system in
excellent condition throughout the year:
Maintenance Task Recommended Frequency Inspect cables every
3–6 months. Clean light fixtures Every 3–4 months Replace damaged connectors As
needed, test the transformer. Once a year Check waterproof seals. Twice a year
Trim the surrounding plants. During the growing season
Additional Maintenance Tips
For the best long-term results when wiring garden lights,
follow these extra maintenance practices:
Test the entire lighting system after severe storms.
Tighten any loose mounting screws or brackets.
Replace damaged fixtures promptly.
Keep the transformer area clean and well-ventilated.
Check for signs of corrosion after heavy rainfall.
Inspect timers and smart lighting controls to ensure they are
operating correctly.
A few minutes of routine maintenance each season can
significantly improve the lifespan and performance of your garden lighting
system. By inspecting cables, cleaning fixtures, replacing worn connectors,
testing the transformer, checking waterproof seals, and trimming nearby plants,
your garden lights wiring installation will continue to provide safe,
efficient, and attractive outdoor lighting for many years.
Wiring Garden Lights vs. Solar Garden Lights
When planning outdoor lighting, many homeowners wonder
whether wiring garden lights or installing solar garden lights is the better
option. Both systems have their advantages, but the right choice depends on
your budget, the size of your garden, and how you plan to use the lighting.
Wired garden lights provide consistent, reliable illumination
and are ideal for permanent installations. Solar garden lights are easier to
install and work well for decorative lighting in areas that receive plenty of
sunlight.
Comparison Table
Feature Wiring Garden LightsSolar Garden Brightness
producesInstallationRequiresReliability: Operates a transformer (for
low-voltage systems), and more planning. Mains-powMaintenance requirestems may
require a licensed electrician.Simple Dcost is lowinstallation with no wiring
required. Just place the lights in a sunny Cost: Higheron.BrightnessLifespan
High-quality brighter and more consistent lighting, making it suitable for
pathways, security, and landscape lighting. Brightness depends on the amount of
sunlight received during the day and is generally lower than wired systems.
ReliabilityOperates consistently regardless of weather when connected to a
reliable power source. Performance can decrease during cloudy weather, winter
months, or in shaded areas. MaintenanceRequires occasional inspection of
cables, connectors, fixtures, and the transformer. Requires cleaning of solar
panels and eventual battery replacement. Running CostLow when using
energy-efficient LED lights, but electricity costs still apply. Virtually no
electricity cost because the lights are powered by the sun. Initial CostHigher
upfront cost due to wiring, transformer, and installation materials. Lower
upfront cost with minimal installation expenses. LifespanHigh-quality LED
fixtures can last 25,000–50,000 hours or more with proper maintenance. LED
fixtures can last for years, but rechargeable batteries typically need
replacing every few years. Best Use Cases Permanent landscape lighting,
pathways, driveways, patios, decks, security lighting, and large gardens.
Decorative lighting, small gardens, temporary installations, and areas where
running cables is difficult.
Advantages of Wiring Garden Lights
Choosing wiring garden lights offers several benefits,
especially if you want dependable outdoor lighting.
Advantages include:
Consistent brightness throughout the night.
Reliable performance in all seasons.
Suitable for larger gardens and long-term installations.
Wide variety of lighting styles and designs.
Better for security and safety lighting.
Easy to expand with additional fixtures.
Although installation requires more planning, wired systems
generally provide better long-term performance.
Advantages of Solar Garden Lights
Solar garden lights are a great choice for homeowners looking
for a simple and eco-friendly lighting solution.
Benefits include:
No electrical wiring required.
Quick and easy DIY installation.
No ongoing electricity costs.
Environmentally friendly.
Easy to move if you redesign your garden.
However, their performance depends heavily on daily sunlight
exposure.
Which Option Is Right for You?
The best choice depends on your lighting needs.
Choose wired garden lights if you:
Want bright, reliable lighting every night.
Need pathway or security lighting.
Have a medium or large garden.
Plan a permanent outdoor lighting installation.
Want greater control over light placement and performance.
Choose solar garden lights if you:
Prefer a quick DIY installation.
Have a small garden.
Want to avoid running cables.
Need decorative accent lighting.
Live in an area with plenty of direct sunlight.
Final Thoughts
Both wired and solar garden lights can improve the appearance
and functionality of your outdoor space. If reliability, brightness, and
long-term performance are your priorities, wiring garden lights is usually the
better investment. On the other hand, if you want a low-cost, cable-free
solution for decorative lighting, solar garden lights are an excellent
alternative.
By comparing installation, brightness, reliability,
maintenance, costs, lifespan, and intended use, you can choose the lighting
system that best suits your garden and your budget.
How do you wire garden lights safely?
To safely complete a wiring garden lights project, start by
planning the layout and using outdoor-rated components. Switch off the power
before making any electrical connections, use waterproof connectors, and follow
the manufacturer’s installation instructions. If you’re installing a
mains-powered system, ensure it complies with local electrical regulations and
consider hiring a licensed electrician if required.
What cable should I use for wiring garden lights?
For most low-voltage wiring garden lights systems, use
outdoor-rated low-voltage cable. The correct cable size depends on the total
wattage of the lights and the cable length. Thicker cables are recommended for
longer distances because they reduce voltage drop and help maintain consistent
brightness.
How deep should garden lighting cables be buried?
The recommended burial depth varies depending on the cable
type, installation method, and local regulations. In general, low-voltage
garden lighting cables are buried in a shallow trench to protect them from
accidental damage while remaining accessible for future maintenance. Always
follow the cable manufacturer’s recommendations and any applicable local
electrical codes.
Can I wire garden lights myself?
Yes, many homeowners can install low-voltage wiring garden
lights systems themselves because they are designed for easier and safer
installation. However, if the project involves connecting directly to the mains
electrical supply, installing new electrical circuits, or if local regulations
require it, the work should be completed or inspected by a licensed
electrician.
Do I need a transformer for garden lights?
Yes, a transformer is required for most low-voltage garden
lighting systems. The transformer converts your home’s mains electricity into a
lower voltage, typically 12V or 24V, that safely powers the garden lights. Be
sure to choose a transformer with enough capacity to handle the total wattage
of all connected fixtures.
Can multiple garden lights be connected to one transformer?
Yes. Multiple lights can be connected to a single transformer
as long as the combined wattage does not exceed the transformer’s rated
capacity. It’s a good idea to leave around 20–30% spare capacity to allow for
future expansion and ensure reliable operation.
Conclusion
Wiring garden lights is an excellent way to improve the
beauty, safety, and functionality of your outdoor space. Whether you’re
lighting pathways, highlighting landscape features, or creating a welcoming
atmosphere for evening gatherings, a well-planned wired lighting system
delivers reliable performance all year round.
By choosing the right tools and materials, planning your
lighting layout, selecting the correct cable size, and following proper
installation techniques, you can build a safe and efficient garden lighting
system. Regular maintenance—such as inspecting cables, cleaning fixtures, and
checking waterproof connections—will help keep your lights operating at their
best for years to come.
If you’re installing a low-voltage system, many projects can
be completed as a DIY task with careful planning. However, for mains-powered
installations or more complex electrical work, it’s always best to follow local
regulations and hire a licensed electrician when necessary.
With the tips and step-by-step guidance in this article,
you’re ready to start wiring garden lights with confidence. A professionally
planned and properly installed lighting system not only enhances your garden’s
appearance but also adds value, improves nighttime safety, and allows you to