
Introduction
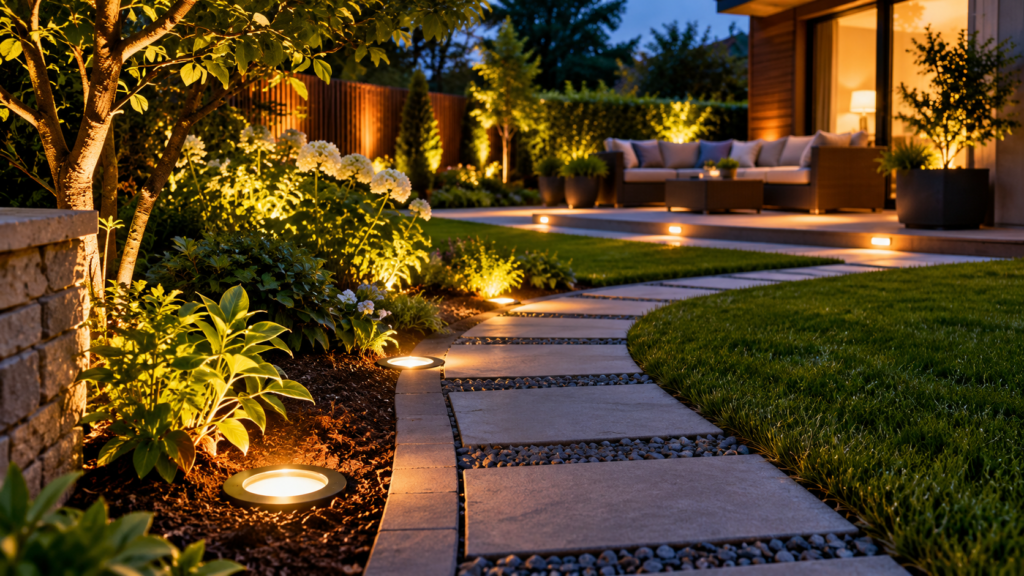
Floor Lights Garden solutions improve the safety, beauty, and functionality of outdoor spaces. From illuminating pathways to highlighting flower beds and patios, discover the best types of garden floor lights, installation tips, maintenance advice, and ideas for choosing the right lighting for your garden.
Table of Contents
What Are Floor Lights in a Garden?
Floor lights in a garden are outdoor lighting fixtures
installed directly into the ground, decking, paving stones, or other flat
surfaces within the garden. They are designed to provide subtle yet effective
illumination without taking up extra space. Many models use energy-efficient
LED technology, while others are powered by solar panels or low-voltage
electrical systems.
These lights are commonly used to brighten walkways, patios,
driveways, flower beds, and outdoor seating areas. Because they sit flush with
the ground or slightly above it, they blend seamlessly into the landscape while
providing reliable lighting after dark.
How Do They Differ from Traditional Garden Lights?
The biggest difference between floor garden lights and
traditional garden lights is their installation and lighting style. Traditional
garden lights are usually mounted on poles, stakes, or walls, making them more
visible during the day. In contrast, floor-mounted lights are integrated into
the ground, creating a cleaner and less intrusive appearance.
Floor lights also produce low-level illumination that spreads
across pathways and surrounding surfaces. This reduces glare and creates a
softer lighting effect, making outdoor spaces feel more inviting. Because they
are installed at ground level, they are also less likely to be damaged by wind
or accidental bumps compared to taller garden light fixtures.
Main Components of Floor Lights in a Garden
Most floor-light garden systems include the following key
components:
Light Fixture: The housing that protects the internal parts
and provides durability against outdoor conditions.
LED Light Source: Produces bright, energy-efficient
illumination with a long lifespan.
Protective Lens: Covers the LED and distributes light evenly
while shielding it from dirt and moisture.
Weatherproof Housing: Made from materials such as stainless
steel, aluminum, or heavy-duty plastic to resist rain, dust, and corrosion.
Power Source: Depending on the model, the power source may be
a low-voltage cable, rechargeable battery, or built-in solar panel.
Mounting Base: Secures the fixture into the ground, decking,
or paving for a stable installation.
Benefits of Using Floor-Mounted Lighting
Installing floor lights in a garden offers several practical
and decorative advantages for any outdoor space.
Improves Safety: Illuminates pathways, steps, and driveways
to reduce the risk of trips and falls after dark.
Enhances Garden Appearance: Highlights landscaping features
such as trees, flower beds, and decorative elements for a professional-looking
outdoor design.
Creates a Modern Look: Flush-mounted fixtures provide a
clean, minimalist appearance that blends naturally into the garden.
Saves Energy: LED and solar-powered options consume less
electricity while delivering reliable brightness.
Built for Outdoor Use: Most floor lights are designed with
waterproof and weather-resistant materials, allowing them to perform well in
different weather conditions.
Low Maintenance: Quality fixtures require minimal upkeep
beyond occasional cleaning and routine inspections.
When chosen and installed correctly, garden floor lights can
transform an ordinary outdoor area into a safer, more attractive, and
functional space that can be enjoyed throughout the evening.
Benefits of Installing Floor Lights in Your Garden
Installing floor lights in a garden is one of the easiest
ways to improve the appearance, safety, and functionality of your outdoor
space. Whether you have a small backyard or a large landscaped garden,
floor-mounted lighting provides reliable illumination while creating a warm and
welcoming atmosphere. Modern floor lights are available in LED, solar-powered,
and low-voltage options, making them suitable for different budgets and garden
designs.
Improves Nighttime Safety
One of the biggest advantages of floor lights in a garden is
improved safety after dark. Well-lit pathways, steps, and driveways make it
easier for family members and guests to move around without the risk of
tripping over obstacles.
Installing floor lights along walkways and entrances also
helps define walking routes, especially in larger gardens. If you have uneven
ground, stairs, or decorative stone paths, strategically placed lights can make
these areas much safer to use at night.
Enhances Garden Beauty
Floor lights in a garden can dramatically improve the visual
appeal of your outdoor space. By placing lights around flower beds, trees,
shrubs, fountains, or sculptures, you can highlight your garden’s best features
and create an attractive nighttime landscape.
Unlike taller lighting fixtures, floor-mounted lights produce
subtle illumination that adds depth without overpowering the surroundings. The
result is a balanced and elegant lighting effect that makes your garden
enjoyable both day and night.
Increases Home Value
A professionally lit garden can boost your home’s curb appeal
and make the property more attractive to potential buyers. Outdoor lighting
gives the impression of a well-maintained landscape while adding a premium look
to patios, driveways, and entrances.
Installing floor lights in your garden is a relatively
affordable upgrade that can improve the overall appearance of your home and
create inviting outdoor living spaces for relaxing or entertaining guests.
Energy-Efficient Lighting Options
Most floor lights in gardens use energy-efficient LED
technology, which consumes much less electricity than traditional bulbs while
providing bright and consistent illumination. LED lights also have a long
lifespan, reducing replacement and maintenance costs.
If running electrical wiring is difficult, solar-powered
floor lights are another excellent choice. They charge during the day using
sunlight and automatically turn on at night, helping you save on electricity
bills while reducing energy consumption.
Low-voltage lighting systems are also popular because they
offer a good balance between brightness, safety, and operating costs, making
them suitable for larger garden lighting projects.
Provides Better Security
A well-lit garden not only looks attractive but also improves
home security. Floor lights in the garden eliminate dark areas around pathways,
entrances, and outdoor living spaces, making it easier to see movement around
your property.
Although they are primarily designed for decorative and
pathway lighting, floor lights can complement other outdoor security measures
by improving visibility throughout the garden.
Creates a Comfortable Outdoor Living Space
Outdoor lighting extends the usability of your garden after
sunset. Whether you’re hosting a barbecue, enjoying dinner on the patio, or
simply relaxing outdoors, floor lights in the garden create a comfortable and
inviting atmosphere.
Soft, evenly distributed lighting makes seating areas, decks,
and garden paths more enjoyable without producing harsh glare, allowing you to
spend more time outdoors in the evening.
Types of Floor Lights in the Garden
Choosing the right floor lights for a garden depends on your
garden layout, lighting goals, and power source. Some lights are designed to
blend seamlessly into pathways, while others are made to highlight landscaping
features or provide smart lighting control. Understanding the different types
will help you select the best option for your outdoor space.
Recessed In-Ground Lights
Recessed in-ground lights are installed flush with the
ground, making them one of the most popular garden floor light options. They
are commonly used along walkways, driveways, patios, and garden paths because
they provide illumination without creating obstacles.
These lights are built with durable, weather-resistant
materials and can withstand foot traffic and various outdoor conditions. They
offer a clean, modern appearance while producing even lighting across the
surrounding area.
LED Floor Lights
LED floor lights are known for their energy efficiency, long
lifespan, and bright illumination. Most modern floor lights for gardens use LED
technology because it consumes less electricity while delivering consistent
performance.
LED lights are available in different brightness levels and
color temperatures, allowing you to create either a warm, relaxing atmosphere
or a brighter, more functional outdoor space. They also require very little maintenance
compared to traditional bulbs.
Solar Floor Lights
Solar floor lights are an excellent choice for homeowners
looking for an eco-friendly and easy-to-install lighting solution. These floor
garden lights contain built-in solar panels that collect sunlight during the
day and automatically power the lights at night.
Since they don’t require electrical wiring, solar lights are
ideal for gardens where running cables would be difficult. However, they
perform best in locations that receive several hours of direct sunlight each
day.
Low Voltage Floor Lights
Low-voltage floor lights operate on a transformer that
reduces household electricity to a safer voltage for outdoor use. They provide
reliable brightness while using less energy than standard electrical systems.
These floor lights in the garden are perfect for larger
landscapes because multiple fixtures can be connected to one low-voltage
system. They are also considered safer for homes with children and pets due to
their lower operating voltage.
Waterproof Deck Lights
Waterproof deck lights are designed specifically for
installation in wooden decks, patios, staircases, and outdoor flooring. Their
low-profile design makes them both attractive and practical for areas with
regular foot traffic.
Most waterproof floor lights in gardens have a high IP
rating, protecting them from rain, dust, and moisture. They improve visibility
around outdoor seating areas while adding a stylish finishing touch to decks
and steps.
Smart Garden Floor Lights
Smart garden floor lights combine modern lighting with
advanced technology. These floor lights in the garden can often be controlled
using a smartphone app, remote control, or voice assistant.
Many smart lighting systems allow you to adjust brightness,
change color temperatures, set timers, or automate lighting schedules. This
provides greater convenience and lets you customize your garden lighting for
different occasions.
Which Type Is Best?
The best floor lights for your garden and outdoor space
depend on your specific needs:
Recessed in-ground lights: Best for pathways, driveways, and
modern landscapes.
LED floor lights: Best for long-lasting, energy-efficient
lighting.
Solar floor lights: Best for simple installation and low
operating costs.
Low-voltage floor lights: Best for larger gardens requiring
consistent brightness.
Waterproof deck lights: Best for decks, patios, and outdoor
steps.
Smart garden floor lights: Best for homeowners who want
convenient control and customizable lighting.
Selecting the right type ensures your garden is not only
well-lit but also safe, attractive, and energy-efficient for years to come.
Best Places to Install Floor Lights in a Garden
Installing floor lights in the garden in the right locations
can improve safety, highlight landscaping, and create a welcoming outdoor
atmosphere. Thoughtful placement ensures your lighting is both practical and
visually appealing. Below are some of the best areas to install floor-mounted
garden lights.
Garden Pathways
Garden pathways are one of the most common places for garden
floor lights. Installing lights along both sides of a path helps guide people
safely through the garden after dark while creating a neat, inviting
appearance.
For the best results, space the lights evenly to provide
consistent illumination without making the pathway look too bright. Warm white
LED lights are often preferred because they create a comfortable and welcoming
atmosphere.
Flower Beds
Floor lights placed around flower beds can showcase colorful
plants and decorative landscaping during the evening. Position the lights
carefully so they highlight flowers and shrubs without shining directly into
people’s eyes.
Low-angle lighting works well for creating depth and
emphasizing textures, making flower beds stand out even after sunset.
Around Trees
Trees become eye-catching focal points when illuminated from
the ground. Installing floor lights in the garden around the base of trees
creates an upward lighting effect that highlights the trunk, branches, and
leaves.
This technique adds height and depth to your landscape while
creating dramatic shadows that enhance the overall garden design. Large
ornamental trees benefit especially from this type of lighting.
Patios and Outdoor Seating Areas
Patios, decks, and seating areas are excellent locations for
floor lights in a garden because they improve visibility while maintaining a
relaxing atmosphere. Install lights around the edges of the patio or integrate
them into the flooring to define the space without causing glare.
Proper lighting makes outdoor dining, entertaining, and
relaxing more enjoyable during the evening.
Driveways
Installing floor lights along the edges of a driveway
improves both safety and curb appeal. The lights help drivers clearly see the
driveway boundaries at night while giving the entrance to your home a modern
and elegant appearance.
Choose durable, waterproof fixtures that can withstand
weather and occasional vehicle traffic if they are installed near driving
surfaces.
Water Features
Ponds, fountains, waterfalls, and other water features look
even more attractive when illuminated with floor lights in the garden.
Carefully positioned lights can create beautiful reflections on the water and
emphasize the movement of flowing water.
When installing lights near water, always select fixtures
with a high waterproof rating to ensure safe and reliable performance.
Garden Steps
Garden steps can become difficult to see after dark,
increasing the risk of trips and falls. Installing floor lights near each step
or along the sides improves visibility and makes stairs much safer to use.
Recessed lights are especially suitable for steps because
they remain flush with the surface, reducing the chance of accidents while
providing subtle illumination.
Tips for Choosing the Right Installation Locations
To get the best results from your floor lights’ garden, keep
these tips in mind:
Focus on lighting important walking areas first.
Highlight key landscape features without overlighting the
garden.
Space lights evenly for balanced illumination.
Avoid placing lights where plants may block the beam as they
grow.
Use warm white lighting for a natural and inviting
appearance.
Choose waterproof fixtures with an appropriate IP rating for
outdoor conditions.
By installing floor lights in garden strategic locations, you
can create an outdoor space that is safer, more functional, and visually
stunning throughout the year.
How to Choose the Best Floor Lights for a Garden
Choosing the right floor lights for your garden is important
if you want your outdoor lighting to be attractive, durable, and
energy-efficient. The best lights should match your garden’s size, design, and
lighting needs while withstanding outdoor weather conditions. Before making a
purchase, consider the following factors.
Brightness (Lumens)
Brightness is measured in lumens, and choosing the correct
level ensures your garden is well-lit without being overly bright.
Here is a general guideline:
50–100 lumens: Decorative lighting for flower beds and garden
borders.
100–200 lumens: Walkways and pathways.
200–400 lumens: Patios, decks, and outdoor seating areas.
400+ lumens: Driveways, entrances, and security-focused
lighting.
Select brightness based on the purpose of the light.
Decorative areas usually need softer illumination, while high-traffic areas
require brighter lighting for safety.
Color Temperature
The color temperature affects the mood and appearance of your
outdoor space. It is measured in Kelvin (K).
2700K–3000K (Warm White): Creates a cozy and inviting
atmosphere, ideal for gardens and patios.
3500K–4000K (Neutral White): Provides balanced lighting for
pathways and general outdoor use.
5000K–6500K (Cool White): Produces brighter, daylight-like
illumination suitable for driveways and security areas.
Most homeowners prefer warm white floor lights in their
gardens because they complement plants and landscaping while creating a
relaxing environment.
Waterproof Rating (IP Rating)
Since floor lights in gardens are exposed to rain, dust, and
changing weather, choosing fixtures with the correct IP (Ingress Protection)
rating is essential.
Common outdoor ratings include:
IP65: Protected against dust and water jets. Suitable for
most garden applications.
IP67: Can withstand temporary immersion in water and is ideal
for areas that may experience heavy rain or standing water.
IP68: Designed for continuous underwater use, making it
suitable for ponds and water features.
For most gardens, IP65 or IP67 fixtures provide excellent
protection.
Material and Build Quality
Outdoor lighting should be made from durable materials that
resist corrosion and weather damage.
Popular materials include:
Stainless Steel: Rust-resistant, durable, and ideal for
modern gardens.
Aluminum: Lightweight, corrosion-resistant, and suitable for
most climates.
Brass: Highly durable with a premium appearance and long
lifespan.
Heavy-Duty Plastic: Affordable, lightweight, and resistant to
moisture, though generally less durable than metal options.
High-quality materials help extend the lifespan of your floor
lights’ garden and reduce maintenance requirements.
Power Source
Different power sources offer different advantages depending
on your garden layout and installation preferences.
Solar-Powered Lights
Solar lights are easy to install because they do not require
wiring. They are environmentally friendly and have low operating costs, making
them ideal for areas that receive plenty of direct sunlight.
Wired Lights
Wired floor garden lights provide consistent brightness
regardless of weather conditions. They are suitable for permanent installations
and larger landscapes but usually require professional installation.
Battery-Powered Lights
Battery-powered lights are portable and convenient for
temporary lighting or locations where wiring is not practical. However,
batteries need periodic replacement or recharging.
Low-Voltage Lights
Low-voltage lighting systems offer an excellent balance
between safety, energy efficiency, and brightness. They are a popular choice
for homeowners installing multiple outdoor lights across larger gardens.
Installation Requirements
Before buying floor lights for the garden, consider how they
will be installed.
Recessed lights require cutting into paving, decking, or
concrete.
Surface-mounted lights are easier to install and maintain.
Solar lights simply need to be positioned where they receive
direct sunlight.
Wired systems may require underground cables and a
transformer.
Choosing lights that match your installation skills can save
both time and money.
Design and Style
The design of your lighting should complement your home’s
architecture and landscape.
Popular styles include:
Modern stainless steel fixtures
Minimalist black finishes
Classic bronze designs
Circular recessed lights
Square floor lights
Decorative LED fixtures
Selecting a consistent style creates a professional-looking
outdoor lighting system that blends naturally with your garden.
Quick Checklist Before Buying
Before purchasing floor lights for your garden, make sure you
consider the following:
Choose the right brightness for the intended area.
Select a warm or cool color temperature based on the desired
atmosphere.
Look for an IP65 or higher waterproof rating.
Buy fixtures made from durable, weather-resistant materials.
Pick a power source that suits your installation needs.
Ensure the lighting style complements your garden design.
Check the product warranty and expected lifespan.
By evaluating these factors, you can confidently choose
garden floor lights that provide reliable performance, enhance your outdoor
space, and deliver years of beautiful, energy-efficient lighting.
Floor Lights Garden Installation Guide
Installing floor lights in a garden correctly ensures they
provide reliable lighting, improve safety, and last for many years. While solar
floor lights are simple to install, wired and low-voltage systems require more
planning. Following the right installation steps will help you achieve
professional-looking results and avoid common mistakes.
Image Placement Suggestion: Add a step-by-step overview image
at the beginning of this section showing the complete installation process,
from planning the layout to testing the lights.
Tools You’ll Need
Before installing floor lights in the garden, gather the
necessary tools and materials.
For most installations, you will need:
Floor light fixtures
Measuring tape
Marker or chalk
Shovel or garden trowel
Drill with hole saw (for decking or patios)
Screwdriver
Wire stripper (for wired systems)
Low-voltage cable and transformer (if required)
Waterproof wire connectors
Spirit level
Protective gloves
Safety glasses
Having everything ready before you begin makes the
installation process faster and more efficient.
Planning the Layout
Careful planning is the key to successful floor light garden
installation.
Start by identifying the areas you want to illuminate, such
as pathways, patios, flower beds, trees, or steps. Walk around your garden at
night if possible to identify dark areas that need additional lighting.
Keep these layout tips in mind:
Space lights evenly for balanced illumination.
Avoid placing lights where growing plants may block them.
Position lights away from sprinkler heads and areas that
collect standing water.
Keep cables as short as possible to reduce voltage drop in
wired systems.
Mark each installation point before digging or drilling.
Image Placement Suggestion: Add a simple garden layout
diagram showing recommended light spacing along a pathway and around
landscaping features.
Preparing the Ground
Once the layout is finalized, prepare each installation
location.
For soil installations:
Remove rocks, roots, and debris.
Dig holes according to the fixture manufacturer’s recommended
depth.
Level the ground to keep each light flush with the surface.
For patios, concrete, or wooden decks:
Mark the exact installation points.
Drill holes using the correct size hole saw.
Clean away dust and debris before installing the fixtures.
A level and stable base helps prevent shifting and ensures
the lights remain secure.
Installing Wired Floor Lights
Wired floor lights in the garden provide consistent
brightness and are ideal for permanent outdoor lighting systems.
Follow these general steps:
Turn off the electrical power before starting any wiring.
Install the low-voltage transformer in a dry, accessible
location.
Lay underground low-voltage cable along the planned route.
Place each light fixture into its prepared opening.
Connect each fixture using waterproof connectors.
Secure the fixtures firmly according to the manufacturer’s
instructions.
Cover underground cables with soil while avoiding sharp bends
or damage.
If your lighting system connects directly to household
electricity, consider hiring a licensed electrician to ensure safe installation
and compliance with local electrical codes.
Installing Solar Floor Lights
Solar floor garden lights are much easier to install because
they require no wiring.
Installation steps include the following:
Choose locations that receive at least 6 to 8 hours of direct
sunlight each day.
Remove any protective film from the solar panels.
Insert or secure each light according to the manufacturer’s
instructions.
Ensure the solar panel faces upward and is not shaded by
trees or buildings.
Allow the batteries to charge fully before the first use.
Proper sunlight exposure is essential for achieving maximum
nighttime brightness.
Testing the Lighting System
After installation, test every fixture to ensure the system
works correctly.
Check the following:
All lights turn on properly.
Brightness is even across the garden.
Fixtures sit securely and remain level.
Wired connections are fully waterproof.
Solar lights charge and automatically switch on after sunset.
Cables are safely buried and protected.
Walk through your garden after dark to confirm that the
lighting provides good visibility without creating excessive glare. Make small
adjustments if needed to improve coverage and appearance.
Installation Tips for the Best Results
To get the most from your floor lights and garden, follow
these best practices:
Use warm white LEDs for a natural and welcoming atmosphere.
Install lights 6 to 10 feet (about 2 to 3 meters) apart along
pathways, depending on brightness.
Avoid aiming lights directly toward seating areas or windows.
Leave extra cable length for future maintenance on wired
systems.
Choose fixtures with an IP65 or higher waterproof rating for
outdoor use.
Test the lighting layout before permanently securing all fixtures.
By following these installation steps, your floor lights
garden will provide safe, attractive, and energy-efficient lighting that
enhances your outdoor space for years to come.
Final Image Placement Suggestion: Add a nighttime photo at
the end of this section showing a completed installation with illuminated
pathways, steps, and landscaping. This gives readers a clear example of what a
well-planned floor-lit garden project can achieve.
Maintenance Tips for Garden Floor Lights
Regular maintenance helps floor lights in the garden stay
bright, safe, and reliable throughout the year. Outdoor lighting is constantly
exposed to dirt, rain, dust, fallen leaves, and changing weather conditions,
all of which can reduce performance over time. Fortunately, a few simple
maintenance tasks can extend the lifespan of your lighting system and prevent
costly repairs.
Clean Light Covers Regularly
Dust, mud, pollen, and leaves can accumulate on the light
covers, reducing the amount of light they produce. Cleaning your floor lights’
garden every few weeks helps maintain maximum brightness and keeps the fixtures
looking new.
To clean the lights:
Turn off the power before cleaning wired lights.
Wipe the lens with a soft microfiber cloth.
Use warm water and mild soap to remove stubborn dirt.
Dry the fixture completely before turning it back on.
Avoid abrasive cleaners or rough brushes that could scratch
the lens.
Regular cleaning also allows you to spot minor issues before
they become bigger problems.
Inspect Wiring
If you have wired or low-voltage floor lights in your garden,
inspect the wiring several times a year to ensure everything remains in good
condition.
Look for:
Loose wire connections
Cracked or damaged insulation
Exposed cables
Signs of animal damage
Corrosion around connectors
Replace damaged cables immediately to prevent electrical
faults and maintain safe operation.
Replace Damaged LEDs
LED bulbs are designed to last for many years, but they may
eventually become dim or stop working.
If one or more garden floor lights appear darker than the
others:
Check whether the LED module can be replaced.
Replace the faulty LED with the correct model recommended by
the manufacturer.
Test the fixture after installation to confirm proper
operation.
Replacing a damaged LED promptly keeps the lighting system
looking balanced and prevents dark spots in your garden.
Check Waterproof Seals
Outdoor lighting depends on effective waterproof protection.
Over time, rubber seals and gaskets can wear out, allowing moisture to enter
the fixture.
Inspect your floor lights and garden for:
Cracked rubber seals
Loose fixture covers
Condensation inside the lens
Signs of water damage
Replace worn seals immediately to prevent corrosion and
electrical failures. Always ensure the fixture is tightly closed after
maintenance.
Trim Nearby Plants
Plants and shrubs naturally grow over time and may block the
light output.
Regularly trim vegetation around your floor lights’ garden
to:
Maintain even light distribution.
Prevent branches from scratching the fixtures.
Improve airflow around the lights.
Reduce moisture buildup caused by dense foliage.
Keeping plants under control also enhances the overall
appearance of your landscape lighting.
Remove Dirt and Leaves
Leaves, mulch, grass clippings, and other garden debris can
quickly collect around floor-mounted lights. If left unattended, they may block
light output or trap moisture around the fixture.
Make it a habit to:
Sweep pathways regularly.
Remove fallen leaves after storms.
Clear soil from around recessed fixtures.
Keep drainage areas free from debris.
Check lights after heavy rain or strong winds.
This simple task helps your floor lights’ garden continue
operating efficiently while reducing the risk of moisture-related damage.
Perform Seasonal Maintenance
Each season brings different challenges for outdoor lighting.
A quick inspection every few months helps keep your lighting system in
excellent condition.
Spring
Clean all fixtures after winter.
Check for water damage.
Test every light.
Summer
Remove dust and pollen.
Trim fast-growing plants.
Inspect solar panels for dirt.
Autumn
Clear fallen leaves frequently.
Check waterproof seals before rainy weather.
Tighten any loose fixtures.
Winter
Remove snow or ice carefully.
Inspect for freeze damage.
Store removable solar lights if severe weather is expected.
Quick Maintenance Checklist
Follow this simple checklist to keep your floor lights and
garden performing at their best:
Clean light covers every 2–4 weeks.
Inspect wiring and cable connections regularly.
Replace damaged LEDs when needed.
Check waterproof seals for wear or leaks.
Trim nearby plants to prevent blocked light.
Remove leaves, dirt, and debris around fixtures.
Test the entire lighting system every season.
With regular care, floor lights in your garden will continue
to provide reliable illumination, improve outdoor safety, and enhance the
beauty of your garden for many years.
Common Problems and How to Fix Them
Even high-quality floor lights in a garden can develop
problems over time due to weather exposure, dirt, moisture, or normal wear and
tear. The good news is that many common issues can be fixed with basic
troubleshooting and regular maintenance. Below are the most frequent problems
homeowners encounter and how to solve them.
Lights Not Turning On
If your floor lights’ garden fails to turn on, start with a
few simple checks before assuming the fixture is faulty.
Possible Causes:
Power supply is disconnected.
Circuit breaker or fuse has tripped.
Loose wire connections.
Dead LED module or bulb.
Solar battery is fully discharged.
Light sensor is malfunctioning.
How to Fix It:
Verify that the power source is switched on.
Reset the circuit breaker if necessary.
Tighten any loose electrical connections.
Replace the LED module or bulb if it has failed.
For solar lights, clean the solar panel and allow a full day
of charging.
Test the light sensor by covering it to simulate darkness.
Flickering Lights
Flickering is a common issue that usually indicates an
electrical or connection problem.
Possible Causes:
Loose wiring.
Faulty transformer.
Moisture inside the fixture.
Worn-out LED driver.
Voltage fluctuations.
How to Fix It:
Inspect and tighten all wire connections.
Check the transformer output for low-voltage systems.
Dry the fixture if moisture is present.
Replace damaged drivers or LED modules.
Ensure the total wattage does not exceed the transformer’s
capacity.
Water Inside Fixtures
Although most floor lights in gardens are weatherproof,
damaged seals or improper installation can allow water to enter the fixture.
Possible Causes:
Cracked lens.
Worn rubber gasket.
Loose fixture cover.
Incorrect installation.
Blocked drainage around the light.
How to Fix It:
Turn off the power before opening the fixture.
Dry all internal components completely.
Replace damaged seals or cracked lenses.
Reseal the fixture according to the manufacturer’s
instructions.
Improve drainage if water regularly collects around the
light.
Choosing fixtures with an IP65 or IP67 rating helps reduce
the risk of water damage.
Dim Lighting
If your floor lights’ garden appears less bright than usual,
the problem is often easy to identify.
Possible Causes:
Dirty light lens.
Aging LED module.
Low battery charge (solar models).
Voltage drop in long cable runs.
Obstructed light output due to overgrown plants.
How to Fix It:
Clean the lens with a soft cloth and mild soap.
Replace aging LED modules if necessary.
Allow solar lights to fully recharge in direct sunlight.
Inspect cables for damage or excessive length.
Trim nearby plants that block the light.
Uneven Illumination
Uneven lighting can make pathways and outdoor spaces look
unbalanced while reducing visibility.
Possible Causes:
Inconsistent spacing between fixtures.
Different brightness levels.
Incorrect beam angles.
Partially blocked lights.
How to Fix It:
Reposition fixtures for even spacing.
Use lights with matching brightness and color temperature.
Adjust beam direction where possible.
Remove obstacles such as plants, mulch, or decorative
objects.
Planning your lighting layout before installation can help
prevent uneven illumination.
Solar Lights Not Charging
Solar-powered floor lights in a garden depend on sufficient
sunlight to operate effectively. If they stop charging, several factors may be
responsible.
Possible Causes:
Dirty solar panel.
Shaded installation location.
Old rechargeable battery.
Faulty charging circuit.
Winter weather or limited sunlight.
How to Fix It:
Clean the solar panel with a damp microfiber cloth.
Move the light to a sunnier location.
Replace the rechargeable battery if it no longer holds a
charge.
Check for visible damage to the solar panel.
During cloudy seasons, expect shorter operating times.
Quick Troubleshooting Checklist
If your floor lights’ garden is not working properly, follow
this checklist before replacing the fixtures:
Confirm the power supply is working.
Clean the light lenses and solar panels.
Inspect all wiring and connectors.
Replace damaged LEDs or rechargeable batteries.
Check waterproof seals for leaks.
Remove leaves, dirt, or plants blocking the light.
Test the transformer on low-voltage systems.
Ensure the fixtures receive adequate sunlight if they are
solar-powered.
Most problems with floor lights in a garden can be resolved
with routine maintenance and simple repairs. Regular inspections help identify
small issues early, keeping your outdoor lighting safe, efficient, and
attractive throughout the year.
Final Image Placement Suggestion: Add a troubleshooting
infographic at the end of this section summarizing common problems, their
likely causes, and the recommended solutions. This provides readers with a
quick reference guide they can use whenever their floor lights or garden needs
attention.
Floor Lights Garden vs. Other Garden Lighting
Choosing the right outdoor lighting depends on your garden’s
design, the areas you want to illuminate, and the atmosphere you want to
create. While every type of garden lighting has its advantages, floor lights in
gardens stand out for their modern appearance, durability, and ability to
provide safe, low-profile illumination. Understanding how they compare with
other lighting options can help you make the best choice for your outdoor
space.
Feature floor lights, garden path lights, spotlights, string
lights, and safety. Excellent Good Fair Poor Appearance Modern, Traditional,
Dramatic, Decorative, Durability High, Medium, High, Medium Maintenance; Low,
Medium, Medium, High; Best For Walkways & Landscapes, Paths, Trees, Patios.
Safety
When it comes to safety, floor lights in gardens are one of
the best choices. Because they are installed flush with the ground, they
provide excellent visibility without creating obstacles along walkways or
driveways. This makes them ideal for pathways, steps, and entrances where
preventing trips and falls is a priority.
Path lights also improve visibility but extend above the
ground, making them more vulnerable to accidental damage. Spotlights are useful
for highlighting specific features but may create shadows if not positioned
correctly. String lights provide ambient lighting but generally do not produce
enough illumination to safely light walking areas.
Appearance
Floor lights in a garden offer a sleek, modern look that
blends seamlessly into the landscape. During the day, they remain discreet, and
at night they create elegant lighting effects without drawing attention to the
fixtures themselves.
Path lights provide a more traditional appearance and are
often used in classic garden designs. Spotlights create bold lighting effects
by emphasizing trees, walls, or sculptures, while string lights add a
decorative and festive atmosphere that works well for outdoor entertaining.
Durability
Most floor lights in gardens are built with strong materials
such as stainless steel or aluminum and feature weatherproof designs with high
IP ratings. They are made to withstand rain, dust, and regular foot traffic,
making them a long-lasting outdoor lighting solution.
Spotlights are also highly durable because they are designed
for permanent outdoor use. Path lights generally have moderate durability since
their exposed posts can bend or become damaged. String lights are more delicate
and often require replacement after prolonged exposure to harsh weather.
Maintenance
One of the biggest advantages of floor lights in a garden is
their low maintenance requirements. Regular cleaning of the lens and occasional
inspections for debris are usually all that’s needed to keep them working
efficiently.
Path lights require periodic straightening, cleaning, and
bulb replacement. Spotlights may need beam adjustments and lens cleaning over
time. String lights often require the most maintenance because bulbs, wiring,
and clips can wear out or become damaged due to weather exposure.
Best Applications
Each lighting type is best suited for different areas of the
garden:
Floor Lights Garden: Perfect for walkways, patios, driveways,
steps, and landscape borders.
Path Lights: Ideal for marking garden paths and flower bed
edges.
Spotlights: Best for highlighting trees, sculptures, walls,
fountains, and architectural features.
String Lights: Great for patios, pergolas, gazebos, outdoor
dining areas, and festive decorations.
Many homeowners combine multiple lighting types to achieve
both practical illumination and decorative effects. For example, floor lights
in a garden can safely light pathways, while spotlights highlight large trees
and string lights create a cozy atmosphere over a seating area.
Which Lighting Option Is Best?
If your goal is to improve safety, create a clean modern
appearance, and enjoy long-lasting performance, floor lights for gardens are
the best all-around choice. They provide reliable illumination, require minimal
maintenance, and blend naturally into almost any landscape design.
However, no single lighting type suits every purpose.
Combining floor lights in a garden with path lights, spotlights, or string
lights allows you to create a balanced outdoor lighting system that is both
functional and visually appealing. By selecting the right mix of fixtures, you
can enjoy a beautiful garden that remains safe, inviting, and enjoyable long
after the sun goes down.
Mistakes to Avoid When Installing Floor Lights in a Garden
Installing floor lights and garden fixtures correctly helps
you achieve better lighting, longer-lasting performance, and a safer outdoor
space. However, a few common mistakes can reduce brightness, shorten the
lifespan of the lights, or create safety hazards. Avoid the following errors to
get the best results.
Installing Lights Too Close Together
One of the most common mistakes is placing lights too close
to each other. This creates overly bright spots while leaving other areas
poorly lit. Before installation, plan the spacing based on the beam angle and
brightness of each fixture. In most cases, leaving 6–10 feet (2–3 meters)
between lights provides balanced illumination for pathways and gardens.
Ignoring the Lighting Layout
Installing floor lights and garden fixtures without a clear
layout often leads to uneven lighting and wasted energy. Sketch your garden
first and decide which areas need illumination, such as walkways, flower beds,
patios, or trees. Planning the layout ensures a clean, professional-looking result.
Choosing the Wrong Brightness
Using lights that are too bright can create glare, while
lights that are too dim may not provide enough visibility. Select brightness
according to the purpose:
100–200 lumens for pathways
200–400 lumens for landscape accents
500+ lumens for security lighting
Matching the brightness to the application improves both
appearance and functionality.
Poor Cable Management
For wired floor, garden, and lighting systems, leaving cables
exposed is both unattractive and unsafe. Cables should be buried at the
recommended depth or hidden under protective conduit where necessary. Secure
all connections properly to prevent moisture damage and accidental trips.
Installing Lights in Poor Drainage Areas
Ground lights placed in areas where water collects may suffer
from corrosion or electrical issues over time. Always choose well-drained
locations or improve drainage before installation. Even waterproof fixtures
perform better when they are not constantly submerged in standing water.
Forgetting Waterproof Connections
Many installation problems occur because connectors are not
sealed correctly. Use weatherproof connectors and waterproof junction boxes for
all outdoor electrical connections. This helps protect your floor, lights,
garden system, and rain, humidity, and irrigation waters.
Not Testing Before Final Installation
Some homeowners permanently install fixtures before testing
them. Always connect the lights temporarily and check that every fixture works
correctly before burying cables or securing lights in place. This saves time
and prevents unnecessary digging later.
Blocking the Light with Plants
Plants grow over time and can block the light beam. Leave
enough space around fixtures and trim nearby shrubs regularly. Proper
maintenance keeps your floor lights’ garden looking bright and attractive
throughout the year.
Using Low-Quality Fixtures
Cheap lighting fixtures may have poor waterproofing, weaker
materials, and shorter lifespans. Investing in high-quality outdoor-rated
lights reduces maintenance costs and provides better long-term performance.
Skipping Regular Maintenance
Even a properly installed floor-lighting garden system needs
occasional maintenance. Clean the lenses, inspect wiring, tighten loose
fixtures, and remove dirt or leaves that may reduce brightness. Regular
inspections help prevent small issues from becoming expensive repairs.
What are floor lights and garden fixtures used for?
Floor lights and garden fixtures are used to illuminate
walkways, driveways, patios, flower beds, and landscape features. They improve
safety by making outdoor areas easier to navigate at night while also enhancing
the overall appearance of your garden.
Are floor lights and garden fixtures waterproof?
Most floor lights and garden products are designed for
outdoor use and come with waterproof ratings such as IP65, IP67, or IP68.
Always check the IP rating before purchasing to ensure the lights can withstand
rain, dust, and other outdoor conditions.
Should I choose solar or wired floor lights for the
garden?
It depends on your needs. Solar lights are easier to install
and have no electricity costs, making them ideal for small gardens. Wired
lights provide brighter, more consistent illumination and are better for larger
landscapes or areas that require reliable lighting throughout the night.
How far apart should floor lights in a garden be
installed?
For most pathways and landscape lighting, install floor
lights and garden fixtures about 6–10 feet (2–3 metres) apart. The exact
spacing depends on the beam angle, brightness, and the lighting effect you want
to achieve.
How long do floor light garden fixtures last?
LED floor lights garden fixtures typically last between
30,000 and 50,000 hours. High-quality fixtures with proper installation and
regular maintenance can provide many years of reliable outdoor lighting.
Conclusion
Choosing the right floor-light garden system is one of the
best ways to improve both the beauty and functionality of your outdoor space.
Whether you prefer solar, low-voltage, or wired lighting, selecting
high-quality fixtures, planning the layout carefully, and installing them
correctly will ensure reliable performance for years to come.
By understanding the different types of floor lights for
gardens, avoiding common installation mistakes, and following regular
maintenance practices, you can create a well-lit landscape that is safe, energy-efficient,
and visually appealing. With the right lighting design, your garden, pathways,
patios, and outdoor living areas can remain inviting long after the sun goes
down.
Invest in the right floor lights and garden fixtures today
and enjoy a brighter, safer, and more attractive outdoor environment throughout
every season.