
Image
Introduction
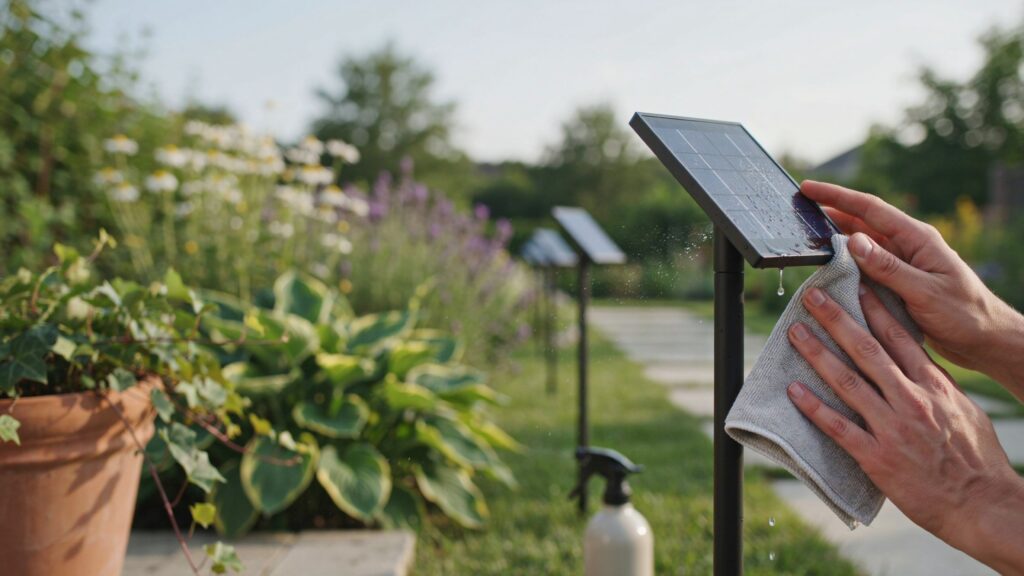
How to clean solar panels on garden lights is easy with a few simple steps. Remove dirt and debris regularly to improve sunlight absorption and keep your solar garden lights working efficiently.
Table of Contents
- Introduction
- Reduced Charging Efficiency
- Dimmer Lights and Shorter Run Times
- Extending the Lifespan of Solar Garden Lights
- Signs Your Solar Garden Light Panels Need Cleaning
- Lights Are Dimmer Than Usual
- Lights Turn Off Earlier at Night
- Visible Dirt and Debris
- Uneven Performance Between Lights
- Reduced Performance After Wind or Rain
- Seasonal Dirt Buildup
- Lights Are Not as Bright as Before
- Shorter Operating Hours at Night
- Lights Are Not as Bright as Before
- Shorter Operating Hours at Night
- Tools and Materials You’ll Need
- Soft Microfiber Cloth
- Soft Sponge or Non-Abrasive Cloth
- Mild Soap and Warm Water
- Spray Bottle or Small Bucket
- Soft-Bristled Brush (Optional)
- Clean Water for Rinsing
- Dry Microfiber Towel
- Soft Microfiber Cloth
- Mild Soap and Water
- Soft Brush
- Spray Bottle
- Clean Towel for Drying
- What to Avoid When Cleaning Solar Panels
- How to Clean Solar Panels on Garden Lights (Step-by-Step)
- How to Clean Solar Panels on Garden Lights
- Step 1: Turn Off the Garden Light (If Possible)
- Step 2: Remove Loose Dirt and Debris
- Step 3: Spray the Panel With Clean Water
- Step 4: Wipe With Mild Soap and Water
- Step 5: Clean Around the Edges
- Step 6: Rinse the Solar Panel
- Step 7: Dry the Panel
- Step 8: Place the Garden Light Back in Direct Sunlight
- Detailed Step-by-Step Method for Cleaning Solar Garden Lights
- Step 1: Turn Off the Solar Garden Lights
- Step 2: Remove Loose Dirt and Debris
- Step 3: Prepare a Gentle Cleaning Solution
- Step 4: Wipe the Solar Panel Surface Carefully
- Step 5: Clean Stubborn Stains and Bird Droppings
- Step 6: Rinse Away Soap Residue
- Step 7: Dry the Panels Completely
- Step 8: Reposition the Lights for Maximum Sunlight
- Common Cleaning Mistakes to Avoid
- Using Abrasive Cleaning Tools
- Using Harsh Chemicals
- Cleaning Under Direct Hot Sunlight
- Applying Too Much Pressure
- Leaving Soap Residue Behind
- Ignoring Regular Maintenance
- Other Cleaning Mistakes to Avoid
- Using Abrasive Cleaners
- Scrubbing With Rough Materials
- Using Pressure Washers
- Cleaning During the Hottest Part of the Day
- Forgetting to Clean Surrounding Fixtures
- How Often Should You Clean Solar Panels on Garden Lights?
- Monthly Cleaning Recommendations
- Seasonal Cleaning Schedule
- Spring
- Summer
- Autumn (Fall)
- Winter
- Factors That Affect Cleaning Frequency
- Dusty Environments
- Nearby Trees
- Weather Conditions
- Bird Activity
- Garden Location
- Additional Maintenance Tips for Solar Garden Lights
- Check the Rechargeable Battery
- Inspect the Solar Panel for Damage
- Keep the Light Fixture Clean
- Trim Nearby Plants
- Check for Water Damage
- Store Lights Properly When Not in Use
- Other Solar Garden Light Maintenance Tasks
- Check Rechargeable Batteries
- Inspect for Water Damage
- Clean Light Covers and Fixtures
- Trim Nearby Plants and Vegetation
- Check Panel Positioning
- Troubleshooting After Cleaning
- Check the Battery
- Make Sure the Light Is Receiving Enough Sunlight
- Inspect the Solar Panel for Damage
- Check the ON/OFF Switch
- Clean the Light Sensor
- Test the Light After a Full Day of Charging
- Replace the Light if Necessary
- Common Solar Garden Light Problems After Cleaning
- Solar Lights Still Not Charging Properly
- Lights Turn Off Too Early
- Panels Look Clean but Performance Is Poor
- When to Replace Batteries or the Entire Light
- FAQs
- Can I Use Glass Cleaner on Solar Panels?
- Will Rain Clean My Solar Panels?
- What Is the Best Cloth for Cleaning Solar Panels?
- Can Dirty Solar Panels Damage My Garden Lights?
- Should I Clean the Solar Panel Even if the Light Is Still Working?
- Conclusion
Reduced Charging Efficiency
One of the main reasons to learn how to clean solar panel surfaces is to maintain efficient charging. Solar panels work by absorbing sunlight and converting it into electricity. When dust, dirt, pollen, or bird droppings cover the panel, less sunlight reaches the solar cells. This reduces the amount of energy stored in the battery during the day, making the garden light less effective at night.
Dimmer Lights and Shorter Run Times
Dirty solar panels often lead to dimmer lights and shorter operating hours. Even a thin layer of grime can reduce the amount of solar energy the panel collects. By knowing how to clean solar panel surfaces correctly and cleaning them regularly, you can help your garden lights produce brighter illumination and stay on for longer after sunset. This is especially important during winter or cloudy weather when sunlight is already limited.
Extending the Lifespan of Solar Garden Lights
Regular maintenance can also help your solar garden lights last longer. When the solar panel stays clean, it charges the battery more efficiently, reducing unnecessary strain on the entire lighting system. Understanding how to clean solar panel surfaces and making it part of your routine helps protect the panel, improve battery performance, and reduce the need for early replacements. A few minutes of cleaning every few weeks can keep your garden lights working reliably for years.
Signs Your Solar Garden Light Panels Need Cleaning
Knowing how to clean solar panel surfaces is important, but first you should recognize when your garden light panels need attention. Dirt and debris can build up gradually, reducing the panel’s ability to collect sunlight. If you notice any of the following signs, it’s probably time to clean the solar panels.
Lights Are Dimmer Than Usual
If your solar garden lights no longer shine as brightly as they once did, a dirty solar panel may be the cause. Dust and grime block sunlight from reaching the solar cells, reducing the amount of energy stored during the day.
Lights Turn Off Earlier at Night
When the battery is not fully charged, your garden lights may only stay on for a few hours after sunset. Before replacing the battery, try to learn how to clean solar panel surfaces properly to restore charging efficiency.
Visible Dirt and Debris
A quick visual inspection can reveal whether the panel needs cleaning. If you see dust, pollen, bird droppings, leaves, or water spots covering the surface, it’s time for maintenance. Even a light layer of dirt can affect performance.
Uneven Performance Between Lights
If some solar garden lights work normally while others appear dim or stop working sooner, compare their solar panels. A dirty panel on one light can reduce its charging ability even if the battery is still in good condition.
Reduced Performance After Wind or Rain
Strong winds can leave dust and leaves on the panels, while rain may leave behind mineral deposits or muddy spots after drying. Checking the panels after bad weather helps ensure they continue to charge efficiently.
Seasonal Dirt Buildup
During spring and summer, pollen, tree sap, and bird droppings can accumulate on solar panels. In autumn, fallen leaves may cover them, while winter can leave dirt and moisture behind. Regular inspection throughout the year helps keep your lights performing at their best.
Lights Are Not as Bright as Before
If your solar garden lights are noticeably dimmer than they used to be, the solar panel may need cleaning. Dust, dirt, and other debris reduce the amount of sunlight the panel can absorb, resulting in a weaker battery charge. Before replacing the light or battery, learn how to clean solar panel surfaces properly and remove any buildup that could be affecting performance.
Shorter Operating Hours at Night
A fully charged solar garden light should stay illuminated for several hours after sunset. If your lights turn off much earlier than usual, a dirty solar panel could be preventing the battery from charging completely during the day. Knowing how to clean solar panel surfaces and cleaning them regularly can help restore longer operating times.
Lights Are Not as Bright as Before
If your solar garden lights are noticeably dimmer than they used to be, the solar panel may need cleaning. Dust, dirt, and other debris reduce the amount of sunlight the panel can absorb, resulting in a weaker battery charge. Before replacing the light or battery, learn how to clean solar panel surfaces properly and remove any buildup that could be affecting performance.
Shorter Operating Hours at Night
A fully charged solar garden light should stay illuminated for several hours after sunset. If your lights turn off much earlier than usual, a dirty solar panel could be preventing the battery from charging completely during the day. Knowing how to clean solar panel surfaces and cleaning them regularly can help restore longer operating times.
Tools and Materials You’ll Need
Before you begin to clean solar panel surfaces on your garden lights, gather a few basic cleaning supplies. Using the right tools helps remove dirt safely without scratching or damaging the solar panel. Most of these items are inexpensive and are probably already available at home.
Soft Microfiber Cloth
A microfiber cloth is ideal for wiping away dust, fingerprints, and light dirt. It is gentle on the solar panel surface and helps prevent scratches while cleaning.
Soft Sponge or Non-Abrasive Cloth
For stubborn dirt or dried-on debris, use a soft sponge or non-abrasive cleaning cloth. Avoid rough scrubbers or steel wool, as they can damage the protective coating on the solar panel.
Mild Soap and Warm Water
If plain water is not enough, mix a few drops of mild dish soap with warm water. This solution is effective for removing bird droppings, pollen, and other stubborn residue without harming the panel.
Spray Bottle or Small Bucket
A spray bottle makes it easy to apply water or the soap solution evenly across the panel. Alternatively, you can use a small bucket filled with clean water for rinsing your cloth or sponge.
Soft-Bristled Brush (Optional)
If dirt has collected around the edges of the solar panel or in small gaps, a soft-bristled brush can help remove it gently. Make sure the bristles are soft enough to avoid scratching the panel.
Clean Water for Rinsing
After cleaning, rinse away any soap residue with clean water. This helps prevent streaks and ensures the solar panel can absorb as much sunlight as possible.
Dry Microfiber Towel
Finish by drying the panel with a clean microfiber towel or allow it to air dry. A dry surface reduces water spots and leaves the panel looking clean and clear.
Avoid using abrasive pads, harsh chemicals, bleach, ammonia-based cleaners, or pressure washers. These can damage the solar panel and reduce its efficiency.
Soft Microfiber Cloth
A soft microfiber cloth is one of the best tools to use when learning how to clean solar panel surfaces. It gently removes dust, fingerprints, and light dirt without scratching the protective coating on the solar panel. Always use a clean cloth to avoid rubbing grit across the surface.
Mild Soap and Water
For stubborn dirt, bird droppings, or sticky residue, use a mixture of mild soap and warm water. A few drops of dish soap are usually enough to loosen grime without damaging the panel. Avoid using strong detergents or chemical cleaners, as they may affect the panel’s protective finish.
Soft Brush
A soft-bristled brush is useful for cleaning around the edges of the solar panel or removing dirt trapped in small corners. Use gentle strokes to avoid scratching the surface. This tool is especially helpful if your garden lights are exposed to leaves, pollen, or dust on a regular basis.
Spray Bottle
A spray bottle filled with clean water or a mild soap solution makes cleaning easier. Lightly spray the panel before wiping it with a microfiber cloth. This helps loosen dirt and reduces the risk of scratching the surface while cleaning.
Clean Towel for Drying
After rinsing the panel, dry it with a clean, soft towel. Drying removes any remaining water droplets and helps prevent water spots that could reduce the panel’s ability to absorb sunlight. A dry, streak-free panel performs more efficiently.
What to Avoid When Cleaning Solar Panels
Knowing how to clean solar panel surfaces also means knowing what not to use. Avoid abrasive scrubbers, steel wool, harsh chemicals, bleach, ammonia-based cleaners, and pressure washers. These can scratch the solar panel, damage its protective coating, or reduce its efficiency over time. It is also best not to use sharp tools to scrape off dirt, as they can permanently damage the panel.
How to Clean Solar Panels on Garden Lights (Step-by-Step)
Learning how to clean solar panel surfaces on garden lights is simple and only takes a few minutes. Following the correct steps will help improve charging efficiency without damaging the solar panel.
How to Clean Solar Panels on Garden Lights
Step 1: Turn Off the Garden Light (If Possible)
If your solar garden light has an ON/OFF switch, turn it off before cleaning. This helps protect the internal components and makes the cleaning process easier. If there is no switch, simply remove the light from the ground if it is safe to do so.
Step 2: Remove Loose Dirt and Debris
Use a dry microfiber cloth or a soft brush to gently remove loose dust, leaves, pollen, and cobwebs from the solar panel. Removing loose debris first prevents scratches during cleaning.
Step 3: Spray the Panel With Clean Water
Lightly spray the solar panel with clean water using a spray bottle. This helps loosen stubborn dirt and makes it easier to wipe away grime without applying too much pressure.
Step 4: Wipe With Mild Soap and Water
Dip a soft microfiber cloth or sponge into a mixture of mild soap and warm water. Gently wipe the solar panel using small circular motions. When learning how to clean solar panel surfaces, remember that gentle cleaning is more effective than scrubbing hard.
Step 5: Clean Around the Edges
Use a soft-bristled brush or the corner of your microfiber cloth to remove dirt trapped around the edges of the solar panel. These areas often collect dust and pollen that can reduce charging performance.
Step 6: Rinse the Solar Panel
Rinse the panel with clean water to remove any remaining soap. Soap residue can leave a film on the surface, reducing the amount of sunlight the panel absorbs.
Step 7: Dry the Panel
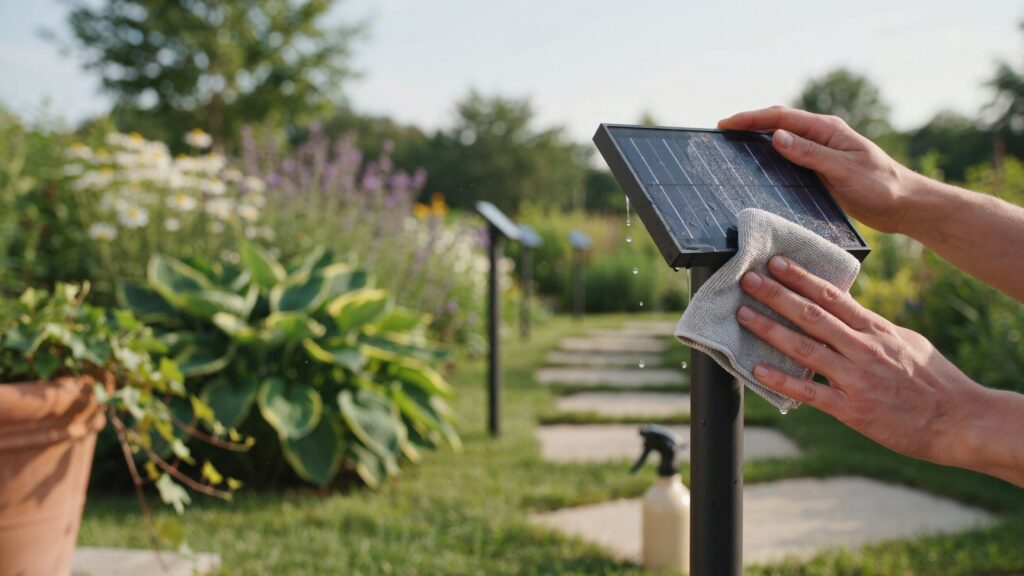
Use a clean, dry microfiber towel to gently dry the panel. You can also let it air dry if the weather is warm. A clean, dry surface helps prevent water spots and keeps the panel working efficiently.
Step 8: Place the Garden Light Back in Direct Sunlight
Once the panel is clean and dry, return the garden light to a location where it receives plenty of direct sunlight. This allows the battery to charge fully and helps restore normal performance.
Detailed Step-by-Step Method for Cleaning Solar Garden Lights
Step 1: Turn Off the Solar Garden Lights
Before you begin to clean solar panel surfaces, turn off your solar garden lights if they have an ON/OFF switch. This helps protect the internal components during cleaning. If the lights do not have a switch, remove them from the ground if possible and place them on a stable surface.
Step 2: Remove Loose Dirt and Debris
Use a soft microfiber cloth or a soft-bristled brush to remove loose dust, leaves, pollen, cobwebs, and other debris from the solar panel. Removing loose particles first helps prevent scratches when wiping the panel.
Step 3: Prepare a Gentle Cleaning Solution
Fill a small bowl or spray bottle with warm water and add a few drops of mild dish soap. Mix the solution gently. Avoid using harsh chemicals, bleach, or abrasive cleaners, as they can damage the protective coating on the solar panel.
Step 4: Wipe the Solar Panel Surface Carefully
Dip a microfiber cloth or soft sponge into the cleaning solution and gently wipe the panel using light, circular motions. When learning how to clean solar panel surfaces, remember that gentle cleaning is enough to remove most dirt without causing damage.
Step 5: Clean Stubborn Stains and Bird Droppings
If bird droppings or stubborn stains remain, let the damp cloth rest on the affected area for a minute or two to soften the dirt. Then wipe it away gently. Never use sharp objects or abrasive scrubbers to scrape off dried debris.
Step 6: Rinse Away Soap Residue
Rinse the solar panel with clean water or wipe it with a damp cloth to remove any soap residue. Leaving soap on the panel can reduce its ability to absorb sunlight and may leave streaks after drying.
Step 7: Dry the Panels Completely
Dry the solar panel with a clean microfiber towel or allow it to air dry completely. A dry, streak-free panel is better able to capture sunlight and maintain efficient charging.
Step 8: Reposition the Lights for Maximum Sunlight
After cleaning, place the solar garden lights back in an area that receives at least 6 to 8 hours of direct sunlight each day. Even if you know how to clean solar panel surfaces correctly, the lights will not perform well if they are shaded by trees, fences, or buildings.
Common Cleaning Mistakes to Avoid
When learning how to clean solar panel surfaces on garden lights, using the correct cleaning method is just as important as cleaning regularly. Avoiding these common mistakes will help protect the solar panel and keep your garden lights working efficiently for years.
Using Abrasive Cleaning Tools
Avoid scrubbing the solar panel with steel wool, scouring pads, or stiff brushes. These tools can scratch the protective surface of the panel, reducing its ability to absorb sunlight. Always use a soft microfiber cloth or a soft-bristled brush instead.
Using Harsh Chemicals
Bleach, ammonia, strong detergents, and other harsh cleaning products can damage the protective coating on the solar panel. A mixture of mild soap and warm water is all you need for safe and effective cleaning.
Cleaning Under Direct Hot Sunlight
Cleaning the panel when it is hot from direct sunlight can cause the water or soap solution to dry too quickly, leaving streaks and water spots. It is best to clean your garden lights early in the morning or in the evening when the panels are cool.
Applying Too Much Pressure
Many people think scrubbing harder will clean the panel better, but this can do more harm than good. When following how to clean solar panel methods, use gentle pressure and let the cleaning solution loosen stubborn dirt naturally.
Leaving Soap Residue Behind
Failing to rinse the panel properly can leave a thin layer of soap that blocks sunlight. Always rinse with clean water and dry the panel with a soft towel to maintain maximum charging efficiency.
Ignoring Regular Maintenance
Waiting until the solar panel is heavily covered with dirt can reduce your garden lights’ performance. Instead, inspect the panels every few weeks and clean them whenever you notice dust, pollen, bird droppings, or other debris. Regular maintenance is much easier than dealing with heavy buildup.
Other Cleaning Mistakes to Avoid
Using Abrasive Cleaners
One of the biggest mistakes people make when learning how to clean solar panel surfaces is using abrasive cleaners. Products containing strong chemicals or abrasive particles can damage the protective coating on the solar panel. Instead, use mild soap and water to clean the surface safely without affecting its performance.
Scrubbing With Rough Materials
Avoid using steel wool, hard brushes, scouring pads, or any rough cleaning materials. These can leave scratches on the solar panel, making it less effective at absorbing sunlight. A soft microfiber cloth or a soft sponge is the best choice for removing dirt without causing damage.
Using Pressure Washers
Pressure washers may seem like a quick cleaning solution, but the strong water pressure can damage the solar panel, loosen seals, or force water into the light fixture. When following how to clean solar panel methods, always use a spray bottle, damp cloth, or gentle stream of water instead.
Cleaning During the Hottest Part of the Day
Cleaning solar panels under direct midday sunlight is not recommended. The panel becomes hot, causing water and soap to evaporate quickly and leave streaks or mineral deposits behind. For the best results, clean your solar garden lights early in the morning or later in the evening when the panels are cool.
Forgetting to Clean Surrounding Fixtures
Many people focus only on the solar panel and forget to clean the rest of the garden light. Dirt, leaves, cobwebs, and debris around the fixture can block sunlight or affect the light’s appearance. While practicing how to clean solar panel techniques, take a few extra minutes to wipe the light housing, remove debris from around the fixture, and trim nearby plants that may cast shade over the panel.
How Often Should You Clean Solar Panels on Garden Lights?
Knowing how to clean solar panel surfaces is only part of proper maintenance. Cleaning them at the right intervals is equally important for keeping your garden lights bright and efficient. The ideal cleaning schedule depends on your local environment, weather conditions, and how quickly dirt accumulates on the panels.
For most homes, cleaning the solar panels once every 2 to 4 weeks is enough to maintain good performance. During this routine cleaning, remove dust, pollen, leaves, and any other debris that may block sunlight.
If you live in a dusty area, near a construction site, or close to busy roads, you may need to clean the panels more frequently because dirt can build up faster. Likewise, if your garden has many trees, check the panels regularly for bird droppings, tree sap, and fallen leaves.
After heavy rain, storms, or strong winds, inspect the panels for mud, water spots, or debris. Although rain can wash away some dust, it often leaves behind mineral deposits or dirt that should be cleaned to keep the panels working efficiently.
As part of your regular garden maintenance, inspect the solar panels every few weeks. If you notice visible dirt or reduced light performance, it’s a good time to apply the proper how-to-clean-solar-panel method. Regular cleaning takes only a few minutes but helps ensure your solar garden lights continue charging efficiently and provide reliable lighting each night.
Monthly Cleaning Recommendations
For most homes, cleaning the solar panels on garden lights once a month is enough to keep them working efficiently. During each cleaning, inspect the panel for dust, pollen, bird droppings, leaves, and water spots. If you notice any buildup, follow the proper how-to-clean-solar-panel method using a soft microfiber cloth, mild soap, and clean water. Regular monthly maintenance helps ensure the battery charges fully and the lights remain bright throughout the night.
Seasonal Cleaning Schedule
The amount of dirt on solar panels changes throughout the year, so adjusting your cleaning routine by season is a good idea.
Spring
Remove pollen, tree sap, and dust that collect on the panels.
Summer
Check for bird droppings, insect residue, and dry dust during hot weather.
Autumn (Fall)
Clear away fallen leaves, dirt, and debris that may block sunlight.
Winter
Inspect the panels for mud, water spots, or snow in colder regions, and clean them whenever necessary.
Following a seasonal maintenance schedule makes solar panel care easier and helps keep your solar garden lights performing consistently all year.
Factors That Affect Cleaning Frequency
Some garden lights require more frequent cleaning than others. The following factors can increase how often you need to clean the solar panels:
Dusty Environments
Homes near dirt roads or construction sites collect dust more quickly.
Nearby Trees
Falling leaves, pollen, tree sap, and bird droppings can cover the panels.
Weather Conditions
Wind, storms, and heavy rain may leave mud, debris, or mineral deposits on the surface.
Bird Activity
Garden lights near bird feeders or nesting areas often need more frequent cleaning.
Garden Location
Lights placed close to flower beds or lawns may collect more soil, grass clippings, and pollen.
Inspect your solar panels regularly and clean them whenever you notice visible dirt or reduced lighting performance. A quick inspection can help you determine the best cleaning schedule for your specific garden.
Additional Maintenance Tips for Solar Garden Lights
Learning how to clean solar panel surfaces is an important part of maintaining solar garden lights, but a few additional maintenance tasks can further improve their performance and extend their lifespan. Regular inspections and simple care can help keep your lights working reliably throughout the year.
Check the Rechargeable Battery
The rechargeable battery stores the energy collected by the solar panel. Over time, batteries lose their ability to hold a full charge. If your solar garden lights remain dim even after you know how to clean solar panel surfaces properly, inspect the battery and replace it if it is old or no longer charging efficiently. Always use the battery type recommended by the manufacturer.
Inspect the Solar Panel for Damage
Regularly check the solar panel for cracks, deep scratches, or signs of moisture inside the panel. Physical damage can reduce charging efficiency and may require replacing the panel or the entire light. Identifying problems early can prevent further damage.
Keep the Light Fixture Clean
Don’t focus only on the solar panel. Wipe the light housing, lens, and surrounding fixture to remove dust, cobwebs, leaves, and dirt. A clean fixture not only looks better but also allows the light to shine more brightly at night.
Trim Nearby Plants
Overgrown shrubs, flowers, or tree branches can block sunlight from reaching the solar panel. Trim nearby plants regularly so the panel receives at least 6 to 8 hours of direct sunlight each day. Even if you know how to clean solar panel surfaces correctly, shaded panels will not charge efficiently.
Check for Water Damage
Inspect the light after heavy rain to make sure water has not entered the housing. Look for moisture inside the lens or battery compartment. If water is present, dry the components thoroughly and check that all seals are secure before using the light again.
Store Lights Properly When Not in Use
If you live in an area with harsh winters or severe weather, consider storing your solar garden lights indoors when they are not needed. Clean the solar panels before storage and keep the lights in a dry place to protect the battery and other components.
Other Solar Garden Light Maintenance Tasks
Check Rechargeable Batteries
Even after following the correct how to clean solar panel method, your garden lights may still perform poorly if the rechargeable batteries are worn out. Most rechargeable batteries gradually lose their capacity after a few years of use. If your lights stay dim or turn off quickly despite having clean solar panels, inspect the batteries and replace them if necessary with the recommended type.
Inspect for Water Damage
Solar garden lights are designed for outdoor use, but water can sometimes enter the housing through damaged seals or cracks. Check the battery compartment and light fixture for signs of moisture, rust, or corrosion. If you find water inside, dry the components thoroughly and replace any damaged seals before using the light again.
Clean Light Covers and Fixtures
While learning how to clean solar panel surfaces is important, don’t forget the rest of the garden light. Dust, cobwebs, and dirt can collect on the light cover and housing, reducing the brightness of the light. Wipe the fixture with a soft damp cloth during each cleaning session to keep it looking clean and performing at its best.
Trim Nearby Plants and Vegetation
Trees, shrubs, and tall plants can block sunlight from reaching the solar panel. Regularly trim nearby vegetation to ensure your solar garden lights receive at least 6 to 8 hours of direct sunlight each day. Better sun exposure allows the battery to charge more efficiently and improves nighttime performance.
Check Panel Positioning
Even the cleanest solar panel will not work efficiently if it is poorly positioned. After completing how to clean solar panel maintenance, make sure the panel is angled toward direct sunlight and is not shaded by fences, buildings, or overgrown plants. Reposition the light if necessary to maximize daily sun exposure.
Troubleshooting After Cleaning
If you’ve followed the correct how to clean solar panel process but your solar garden lights still aren’t working properly, the problem may be caused by something other than a dirty panel. Fortunately, most issues are easy to identify and fix with a few simple checks.
Check the Battery
A clean solar panel cannot fully solve performance issues if the rechargeable battery is old or damaged. If the lights are still dim or turn off quickly, inspect the battery for signs of wear or corrosion. Replacing an old battery often restores normal performance.
Make Sure the Light Is Receiving Enough Sunlight
After cleaning, confirm that the solar panel is getting at least 6 to 8 hours of direct sunlight each day. Shade from trees, fences, walls, or buildings can prevent the battery from charging fully, even if the panel is spotless.
Inspect the Solar Panel for Damage
Look closely at the solar panel for cracks, scratches, or moisture inside the panel. Physical damage can reduce charging efficiency and may require replacing the panel or the entire garden light.
Check the ON/OFF Switch
Some solar garden lights have an ON/OFF switch that may have been turned off during cleaning. Make sure the switch is in the ON position before testing the light at night.
Clean the Light Sensor
The built-in light sensor controls when the garden light turns on and off. Dirt covering the sensor can affect its operation. Gently wipe the sensor with a soft cloth while performing your how-to-clean-solar-panel routine.
Test the Light After a Full Day of Charging
After cleaning and completing all inspections, place the garden light in direct sunlight for a full day. Then test it after sunset. This gives the battery enough time to recharge completely before you decide whether additional repairs or battery replacement are needed.
Replace the Light if Necessary
If you’ve cleaned the panel, checked the battery, inspected for damage, and ensured proper sunlight exposure, but the light still doesn’t work, it may have reached the end of its lifespan. Replacing the light is often the most practical solution.
Common Solar Garden Light Problems After Cleaning
Solar Lights Still Not Charging Properly
If your solar garden lights are still not charging after following the correct how to clean solar panel method, check whether the panels receive enough direct sunlight during the day. Shade from trees, fences, or buildings can prevent the battery from charging fully. Also, inspect the solar panel for cracks, moisture, or other damage that may reduce its efficiency.
Lights Turn Off Too Early
If the lights switch off after only a few hours, the rechargeable battery may no longer hold a full charge. Although knowing how to clean solar panel surfaces helps improve charging efficiency, it cannot restore an old or worn-out battery. Make sure the panel receives at least 6 to 8 hours of direct sunlight, then test the light again after a full day of charging.
Panels Look Clean but Performance Is Poor
Sometimes the solar panel appears clean, but the light still performs poorly. In this case, check for hidden problems such as a damaged solar cell, loose wiring, corrosion in the battery compartment, or a faulty light sensor. You should also confirm that no nearby plants or objects are casting shadows on the panel during the day. If everything looks normal, the rechargeable battery may need replacing.
When to Replace Batteries or the Entire Light
Rechargeable batteries typically last 1 to 3 years, depending on their quality and usage. If your garden light still performs poorly after replacing the battery and following the proper how-to-clean-solar-panel process, the solar panel or internal electronics may have failed. In that case, replacing the entire light is usually the most cost-effective solution, especially if the fixture is several years old or has visible damage.
FAQs
- Can I Use Glass Cleaner on Solar Panels?
It is generally not recommended. Many glass cleaners contain chemicals that may damage the protective coating on the solar panel over time. When learning how to clean solar panel surfaces, it is safest to use mild soap, clean water, and a soft microfiber cloth.
Add Image
- Will Rain Clean My Solar Panels?
Rain can wash away some loose dust, but it usually cannot remove bird droppings, tree sap, pollen, or stubborn dirt. It may also leave behind water spots or mineral deposits. For the best performance, clean the panels manually whenever you notice visible buildup.
Add Image
- What Is the Best Cloth for Cleaning Solar Panels?
A soft microfiber cloth is the best choice because it removes dirt without scratching the solar panel. Avoid using rough cloths, steel wool, or abrasive scrubbers that could damage the panel.
Add Image
- Can Dirty Solar Panels Damage My Garden Lights?
Dirty panels usually do not damage the lights directly, but they reduce the amount of sunlight reaching the solar cells. This results in poor battery charging, dimmer lights, and shorter operating times. Following the correct how to clean solar panel method helps maintain reliable performance and can extend the lifespan of your garden lights.
Add Image
- Should I Clean the Solar Panel Even if the Light Is Still Working?
Yes. Even if your solar garden lights appear to work normally, regular cleaning helps maintain maximum charging efficiency and prevents dirt from building up over time. Preventive maintenance is much easier than removing heavy dirt later.
Add Image